Halo Infinite on Deck: How-To and Best Settings

I’ve noticed some folks over on r/SteamDeck can’t get Halo Infinite to run on their Deck. Well, here’s a step-by-step guide on how to get it to run. Thankfully, it’s not as complicated as it was in the past.
The game has technically been playable on AMD and NVIDIA GPUs since the past three weeks, but on AMD it required Glorious Eggroll’s custom Mesa patch in order for the in-game textures to properly render. And that was close to impossible to do on the Steam Deck, as doing so would require unlocking the file system and could potentially break the system. Well, as of the past few days patching is no longer needed on AMD or on the Steam Deck. It’s a matter of simply downloading GE-Proton – a custom Proton fork – forcing Halo Infinite to use that fork, and removing the video files found in the game’s installation directory, along with a few other simple steps. So far I’ve only tested multiplayer but others have reported that the campaign works as well.
Here’s the TL;DR:
- Increase UMA buffer size to 4 GB in the BIOS
- Make sure you’re opted into the “Preview” branch (or beta SteamOS/Steam Deck client update channels if you don’t see the former)
- Get GE-Proton7-26. Easiest way to do this is by going to Desktop Mode and using ProtonUp-Qt
- Delete all the video files found in the
videosfolder in the game’s install directory (or rename them if you prefer to keep them) - In Game Mode, force the game to use GE-Proton7-26
- Use Medium graphics settings or lower for the best performance (see more details in the “Recommended Settings” section)
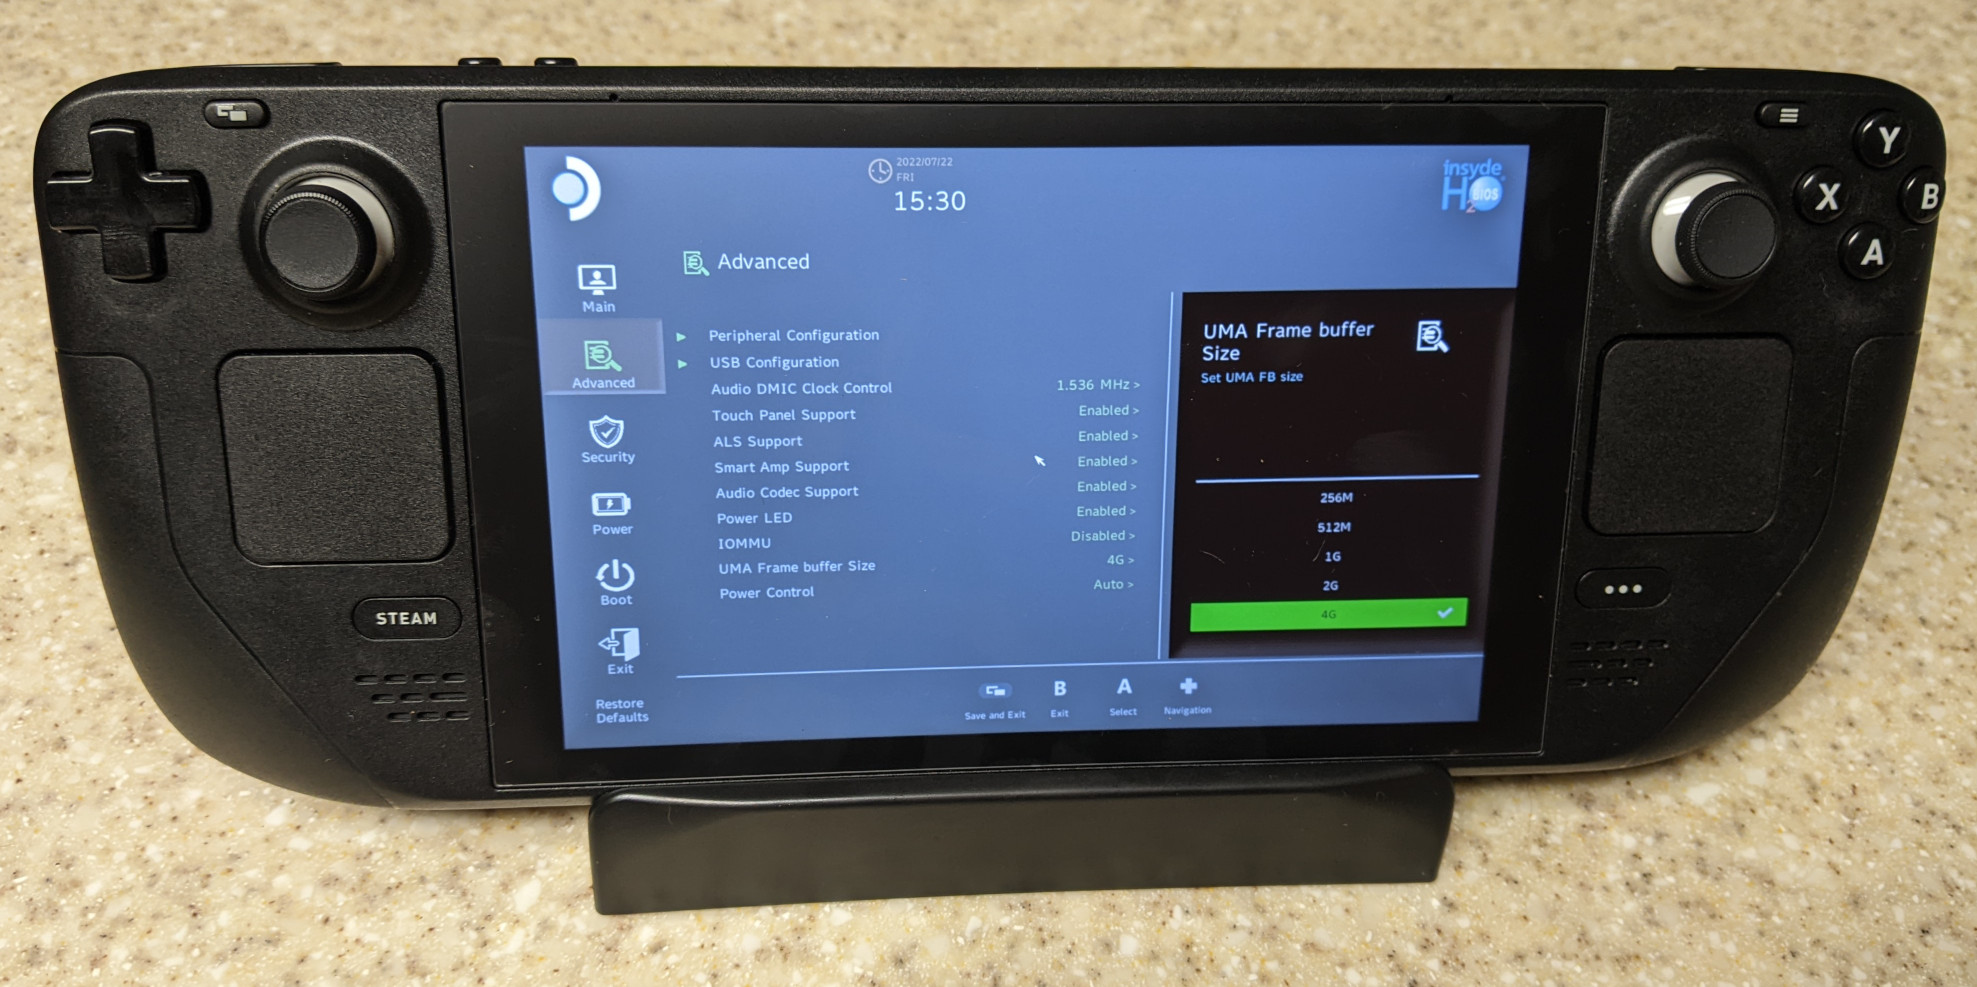
1. Increase UMA Frame Buffer Size⌗
The first thing we’ll need to do is increase the UMA – or Uniform Memory Access – frame buffer to 4 GB. The UMA is part of the Steam Deck’s RAM that is shared with the integrated graphics on the APU and acts as a temporary frame buffer during graphic intensive operations, such as gaming. Increasing this will increase the performance of the game. To do this, we need to access the Steam Deck’s BIOS. With the Steam Deck off, hold the Volume+ button, then press the Power button. When you hear the chime, release the Volume+ button. Navigate to “Setup Utility” with the D-pad, then press A. Under the “Advanced” category, select the “UMA Frame buffer Size” option, press A, then select “4G” (the default value is 1 GB, if you haven’t changed this before). Exit the BIOS, making sure that your change is saved. The Deck should restart.
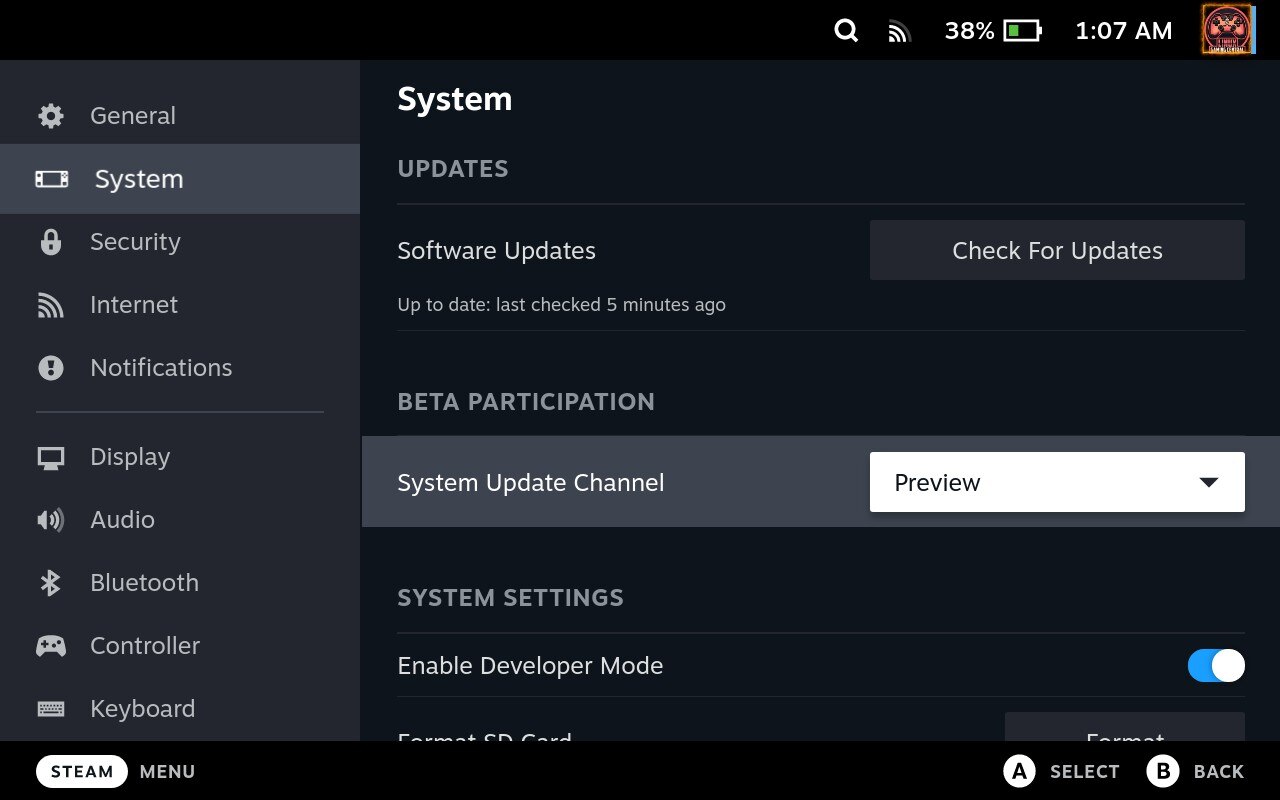
2. Opt into SteamOS Beta⌗
Some have reported that they can’t get the game to run on the stable SteamOS channel. We need to opt into the Preview branch so we can get the updated Mesa drivers. Under the System tab in Steam Settings, go to the “Beta Participation” section, and select “Preview” from the dropdown menu next to “System Update Channel”.
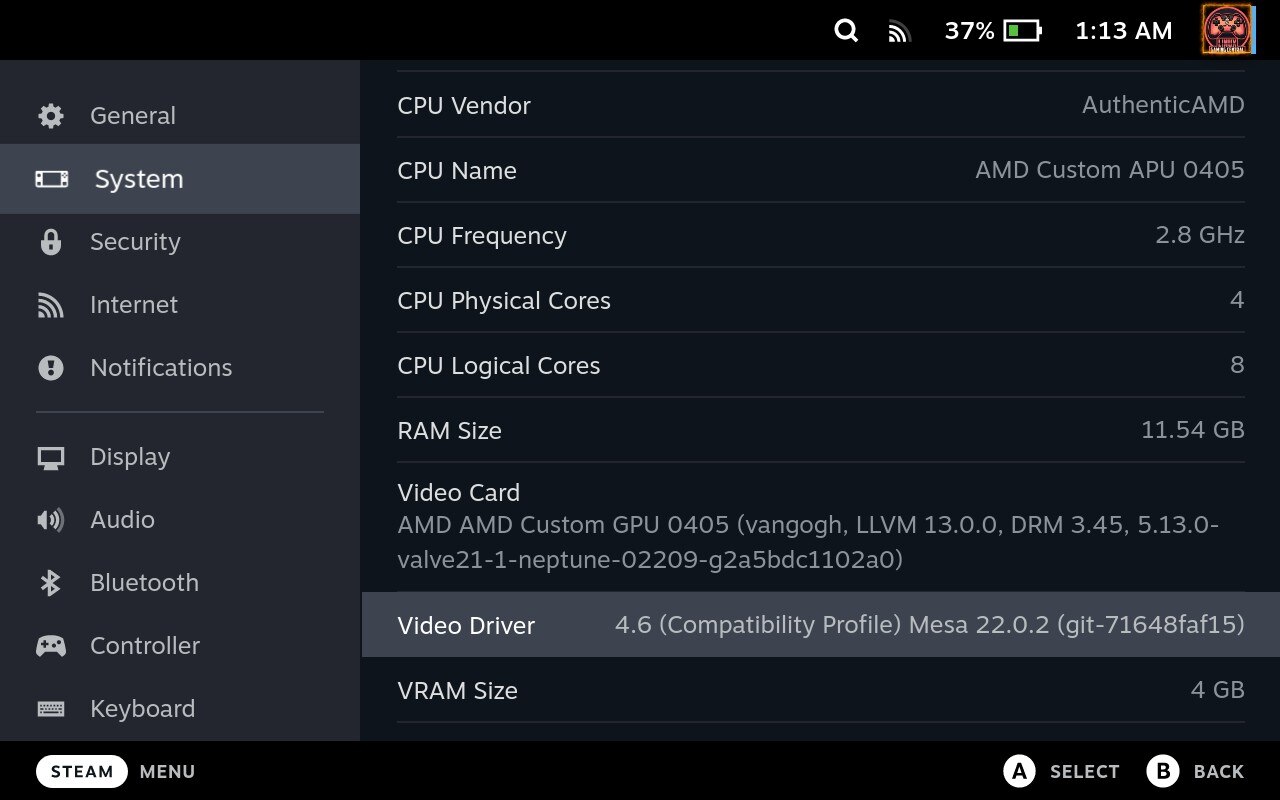
If you don’t see this, you probably have separate SteamOS and Steam Deck Client channels. If so, select “Beta” from both dropdown menus. You will soon get an update; apply it, then restart the Deck. You should now have version 22.0.2 of the Mesa driver. You can verify this by going to the System tab in Steam Settings, and scrolling down to the “Hardware” section.
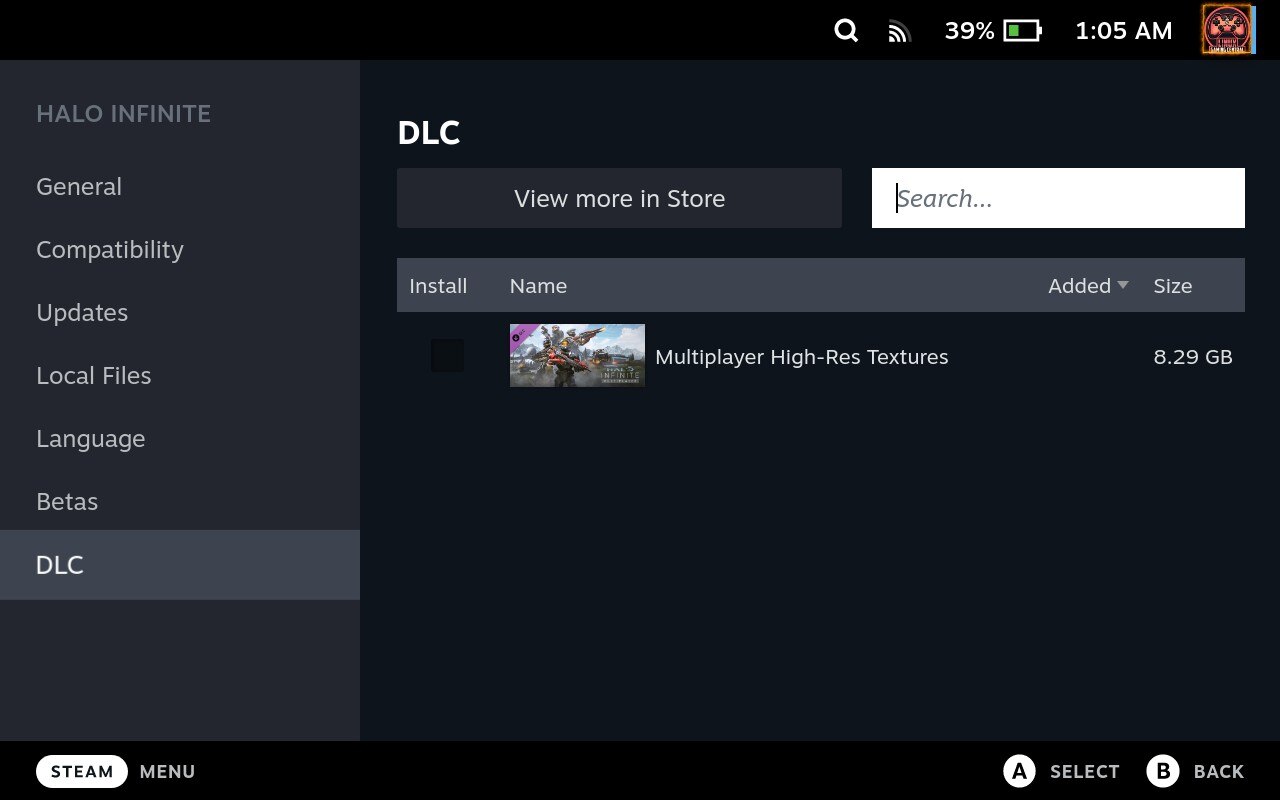
Now, obviously we need to have the game downloaded and installed, if it’s not already. The multiplayer version of the game is free and takes about 23.4 GB of space, without the high-res texture DLC. Installing the high-res textures is not necessary for a resolution as low as the Deck is, unless you’re planning on docking the Deck to an external monitor. Uncheck the box under the DLC tab in the Properties menu for the game, as it will save 8.29 GB of space and take less time to download (it gets checked by default when you install).
3. Get GE-Proton⌗
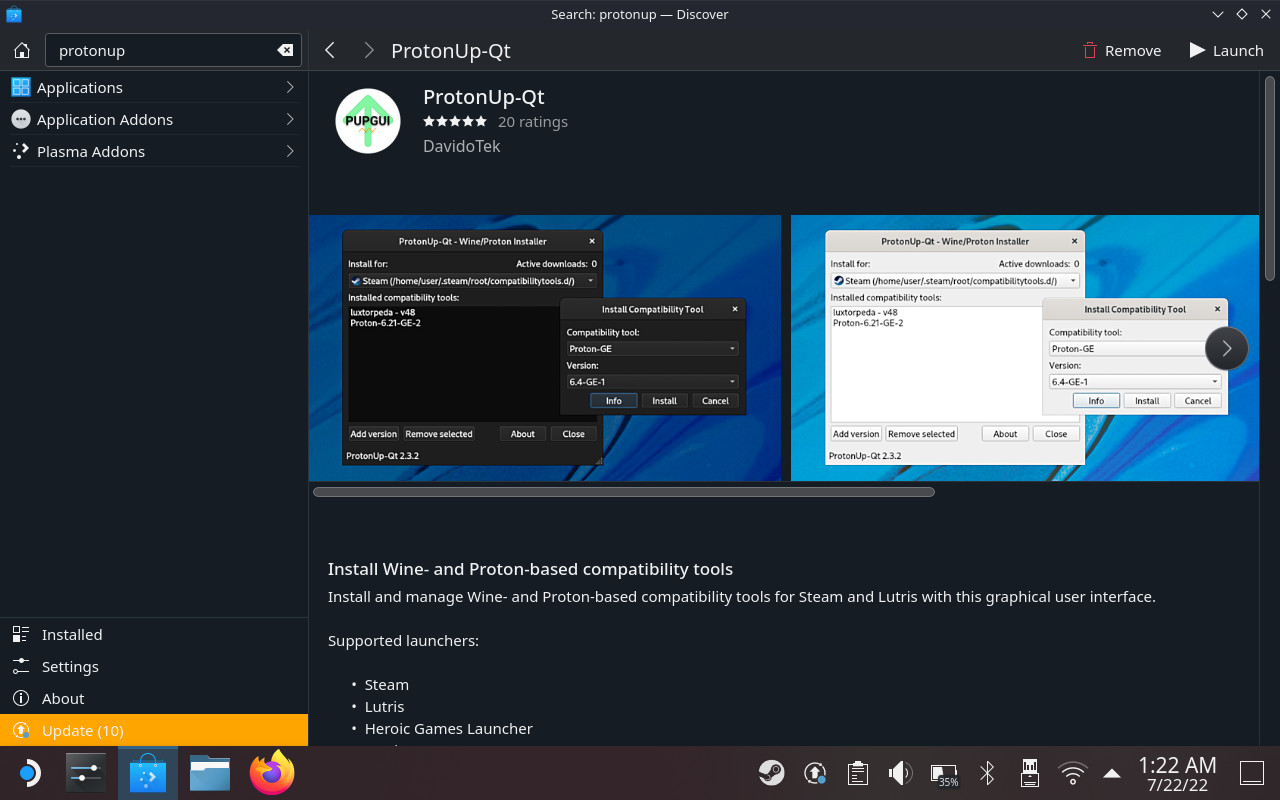
Okay. Now we need GE-Proton. GE-Proton contains the tweaks needed for Halo Infinite to run. The easiest way of doing this is by getting ProtonUp-Qt. And fortunately for us, ProtonUp-Qt is available as a Flatpak, so we can easily install this via the Discover app in Desktop Mode. Just search for “ProtonUp-Qt” in the search bar.
Alternatively you can install ProtonUp-Qt via the command line with:
flatpak install flathub net.davidotek.pupgui2
ProtonUp-Qt should be available under the “Games” section from the Start menu. Open it up. The installation directory should already be set for you.
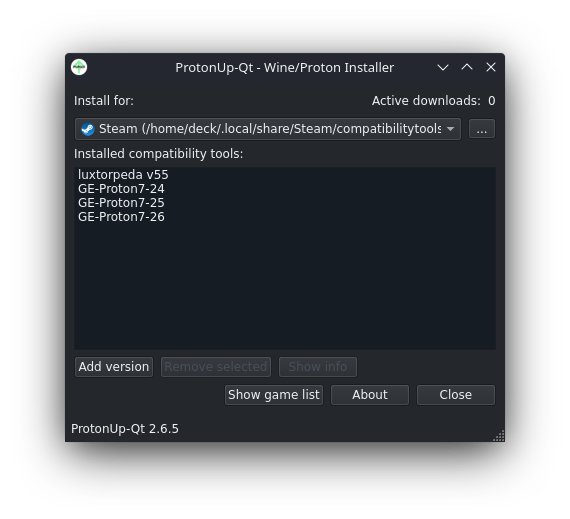
Click “Add version”. We’re going to need GE-Proton7-26 or newer – since 7-26 specifically contains the fix for Halo Infinite to run – and by default this should already be selected.
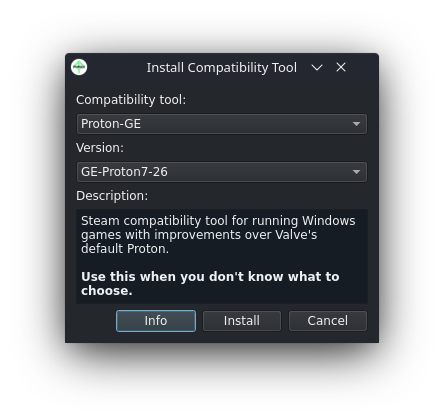
Simply click “Install” and the app will install GE-Proton. GE-Proton7-26 should now be listed in the “Installed compatibility tools” section.
4. Remove/Rename Video Files⌗
One other thing that we’ll need to do while in Desktop Mode is to remove the video files in the game’s installation directory. Otherwise, the game will immediately crash, as GE-Proton doesn’t know how to handle the file format. Launch the desktop version of Steam, go to your library, right-click Halo Infinite, click “Properties…” and under the “Local Files” tab, click Browse…
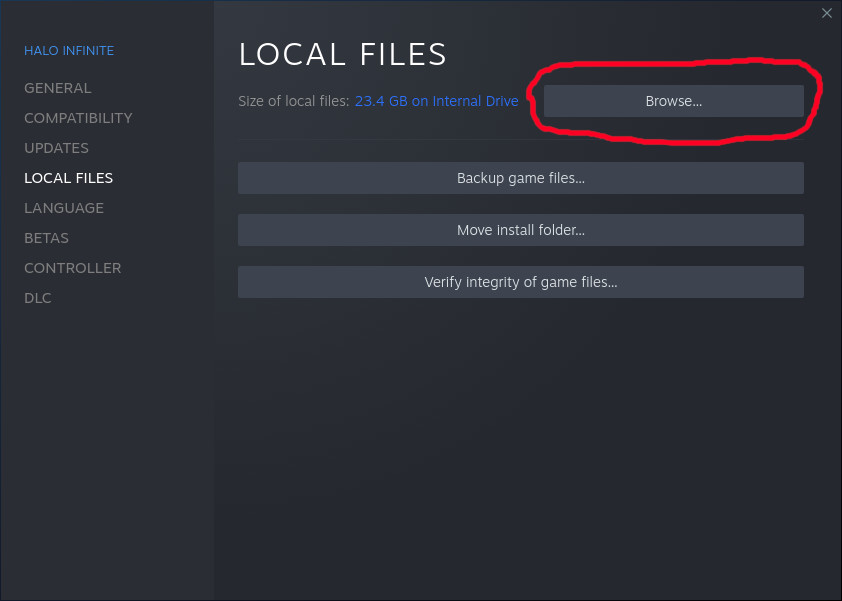
Your file manager should now open to the game’s install directory. Go to the videos folder. Delete all the files there. You can alternatively rename them if you like, but that’s a bit of a pain without an external keyboard attached. Plus you’ll save yourself a couple of extra gigs of space by deleting them.

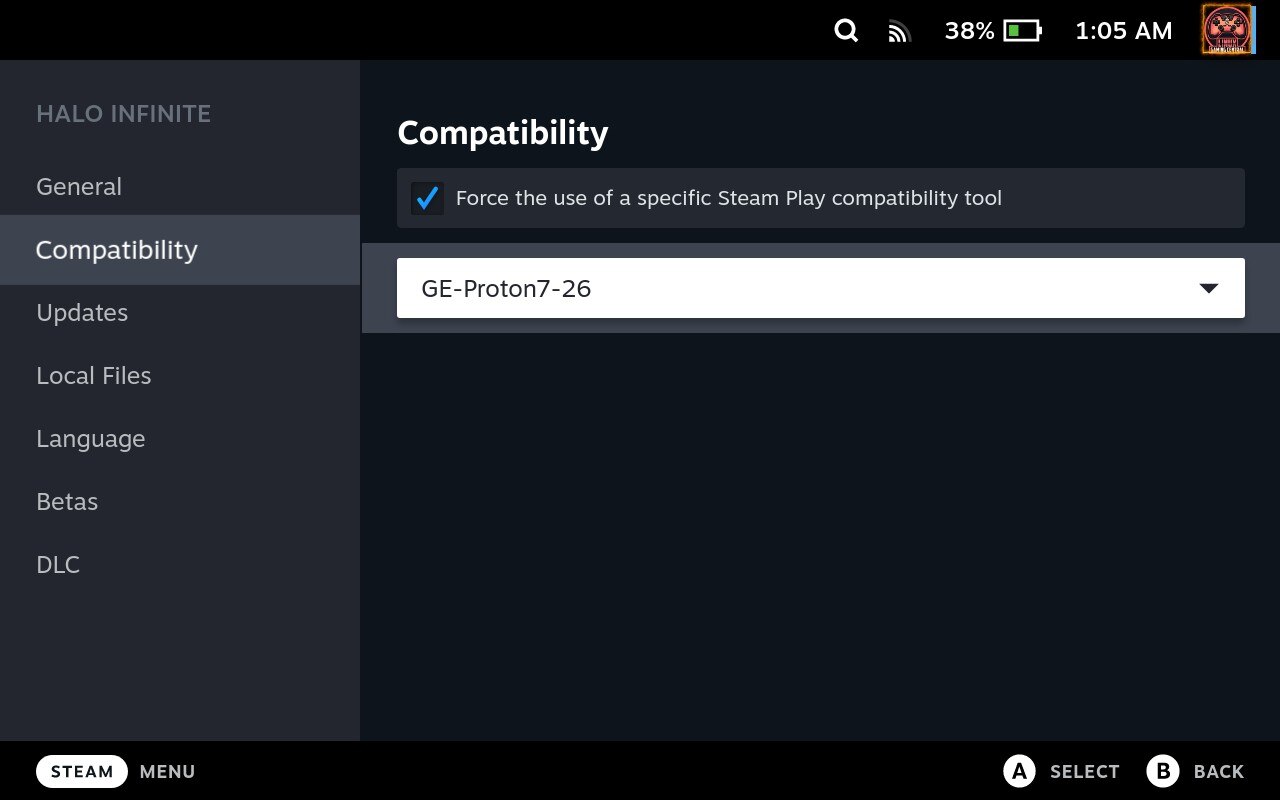
5. Configure the game to use GE-Proton7-26⌗
That’s it for Desktop Mode, now return to Gaming Mode. Go back to the game, and this time select its Properties menu. You can access the properties menu by either pressing Start on the game in your library and selecting “Properties…” or selecting the game and pressing A on the cog icon on the right. Under the “Compatibility” tab, check the box for “Force the use of a specific Steam Play compatibility tool” and select GE-Proton7-26 from the dropdown menu.
Recommended Settings⌗
That’s it! Nothing else is needed to run the game. No extra launch parameters required. However, the default graphics settings might leave some things to be desired. I found setting the graphics to Medium strike a good balance between quality and maintaining a smooth 60 FPS. Make sure Vsync is checked. Set Mininum and Maximum frame rate to 60 FPS. I haven’t really been able to make use of FSR, so I would just keep the resolution as native.
The game is a battery guzzler (25 W!). So you may want to enable half-rate shading to get some more life out of the system. The compromise there is the graphics will look pretty bad. Either that or you can reduce the framerate or refresh rate.
One other thing: don’t put your Deck to sleep. Performance will stagger after waking the device up. You’ll need to restart the system in order to get proper performance back.
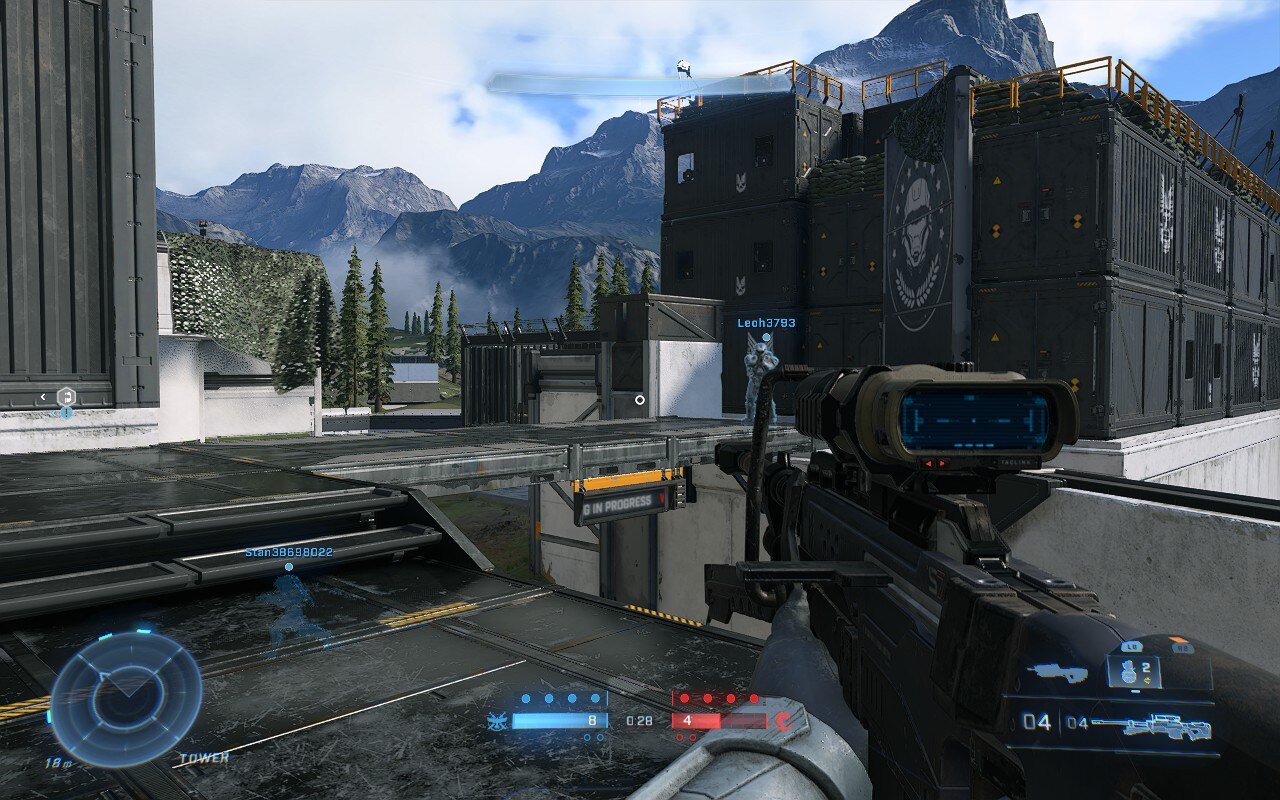
Steam Deck HQ will likely have a report on the game soon, stay tuned for that so you can get even more recommended settings! Also, be sure to check out the video by GamingOnLinux to see the game in action!