Improving the Kazeta Experience

A number of months ago, I had taken a look at Kazeta, an operating system that’s designed to play the user’s self-created “cartridges” by means of external media – be it an SD card or USB drive. It’s a brilliant concept on paper, and is one of the many attempts out there in recent years to help preserve – and, might I also add, revive – the physical era of gaming. What I particularly enjoy about the concept of Kazeta, however, is that you, as the end user, create your own physical media, with things you probably have lying around, including SD cards, MicroSD cards, USB flash drives, etc. This is a much less expensive endeavor, as opposed to shopping on eBay and looking for a $300 proprietary game cartridge that is no longer being produced. You take games you already own – such as those on Steam, GOG, and Epic Games – and create them into your own cartridge. And if you do happen to have some retro game cartridges lying around, you can of course dump them and put them on a Kazeta-based cartridge.
From a philosophical viewpoint, creating physical media for your games (and music) also helps preserve them for years to come. There’s no telling when a publisher decides to stop supporting a certain game, or the license for the game expires and eventually gets de-listed from a digital store front (such as Forza Horizon 4). Your physical cartridges are your “guarantee” that you will have that game for as long as you own that cartridge. Kazeta provides a solid foundation for this.
As I had explained in my review, however, Kazeta only provides said foundation and nothing else. There’s a lot of work that the end user has to do on their part when it comes to creating their own cartridges. It doesn’t help that, if the cartridge fails to load on the system, the system will just shut off automatically. They have to restart the console without the cartridge inserted, connect a keyboard, log into an ugly text-based terminal, and copy the session logs over to their removable media. Not to mention that certain Linux-based games have the D-pad direction reversed, without an easy way to fix it.
I sought out a way to resolve these issues. Not only that, but to improve the overall experience of Kazeta. Thanks to Alkazar making the project open-source, I forked the repository and made it into my own: Kazeta+.
Over the last several months, I have progressively been adding new features, bug fixes, and quality-of-life improvements. I had been digging through some of the issues on the vanilla Kazeta issue tracker – as well as some of the help threads on the Kazeta Discord – and addressing some of the points/features discussed there. It would just be way too long of a post if I went over every single detail. I’ll just jot down some of the more major features/improvements:
-
multi-cart support: the user can now make better use of the available space on their physical media by allowing multiple games to be stored on it as opposed to just one. If Kazeta+ detects multiple
.kzifiles on the media, a menu will be presented with the list of games to play when the user selects “PLAY” in the BIOS. On the other hand, if the user just wants the plug n’ play nature of the original Kazeta console, they can set one of their.kzifiles to have theSetAsDefaultGame=trueline. This will make that game the default that plays whenever the console is turned on with the cartridge inserted. -
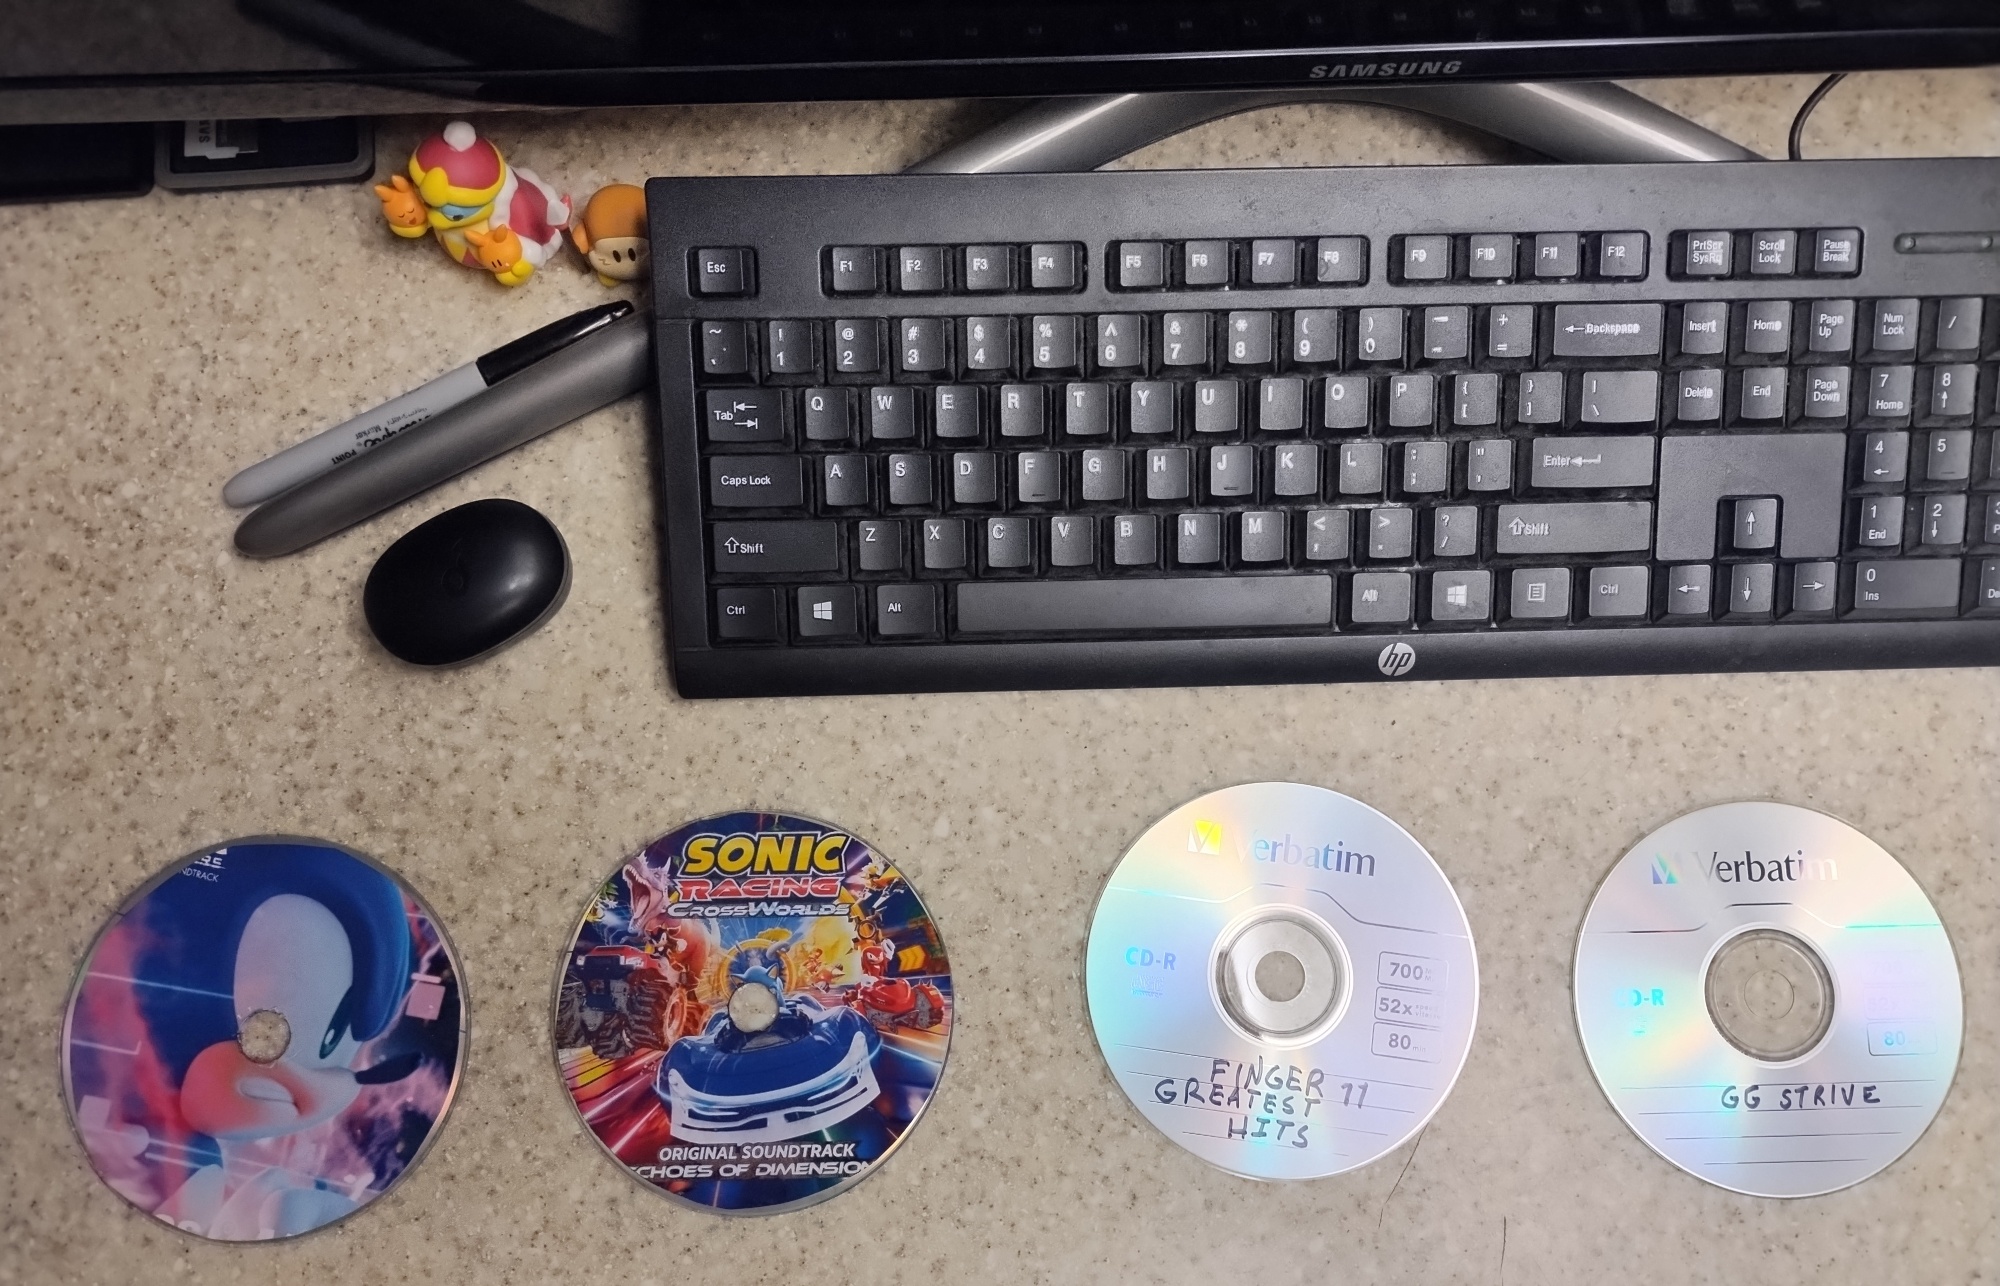
optical media support: in addition to SD cards and USB drives, the user can also burn their games onto a blank CD or DVD, connect said disc to their console, and boot it like they would on any other media. If they have a music CD, they can also play their tunes right through the BIOS, just like in the PS1 days.
-
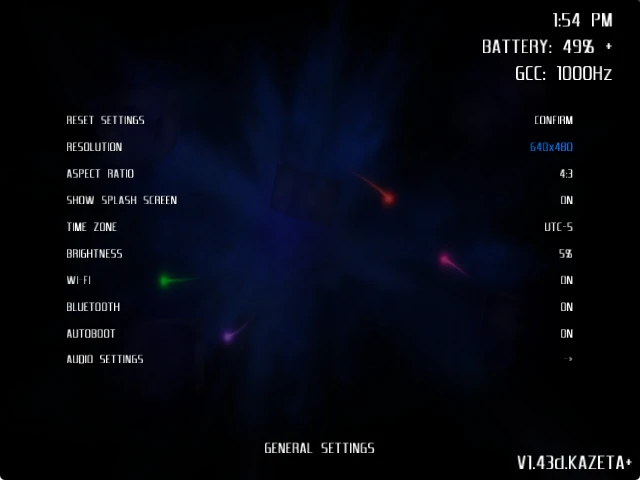
theme support: I think it’s just the “gamer” nature in us to want to skin the user interface and make it more akin to our liking. With Kazeta+, that’s now possible. You can create your own, or download one of the existing themes right through the BIOS, then switch to any one of them through the BIOS settings. Some examples of themes include:
- consoles: PS1/PS2/GameCube/Wii/Dreamcast
- game-specific: Star Fox 64/various Sonic games/Metroid Prime/F-Zero/Zelda series/Smash Bros./Dudelings/Soul Calibur II/Guilty Gear: -Strive-
Each theme comes with its’ own sound effects, background music, background, and font. You can even use a
.mp4video file for the background! -
Bluetooth support: whether that be a wireless controller, or a pair of headphones, Kazeta+ has you covered.
-
game compression support: the user can now compress their games as an Enhanced Read-Only File System (EROFS)
.kzpimage. Depending on the game, this can save generally between 10-15% of space. I’ve seen some instances where it’s even more: Boomerang Fu becomes 141 MB as a compressed image, as opposed to 665 MB uncompressed! Compression also simplifies the way the user transfers their games; they now only have to transfer one file as opposed to a game folder with a.kzifile. -
improved troubleshooting: if a cart fails to boot, there’s an error screen that pops up. It reads off the last 30 lines of the session log.
-
fixes: the user can now fix the D-pad reversal bug by appending a few lines to their
.kzifile. Some games/applications that previously had strange characters for the font are now fixed by installing a few Arch packages related to fonts. Finally, some games that can’t run at all on Kazeta can now run with updated runtime files I’ve made. For example, the Windows 1.2 runtime allows Link’s Awakening DX HD to run on Kazeta/Kazeta+ by adding the .NET 6.0.36 desktop runtime. Other games, like Sonic Adventure 2, can also run with this runtime by changingPROTONVERBtowaitforexitandrun.
Making Cartridges Easier to Make⌗
As I was working on Kazeta+, I had wanted to make it easier for the end-user to create the .kzi file needed for their games to work on their cartridges. For those who aren’t in the know, .kzi files are Kazeta information files. They’re essentially a text-based file that have a similar format to .desktop files, that define the launch behavior for a particular game. An example of a .kzi file might look like this:
Name=Sonic Adventure 2
Id=sonic-adventure-2
Exec=sa2/Launcher.exe
Icon=sa2/icon.png
GamescopeOptions=--mangoapp
Runtime=windows-1.2
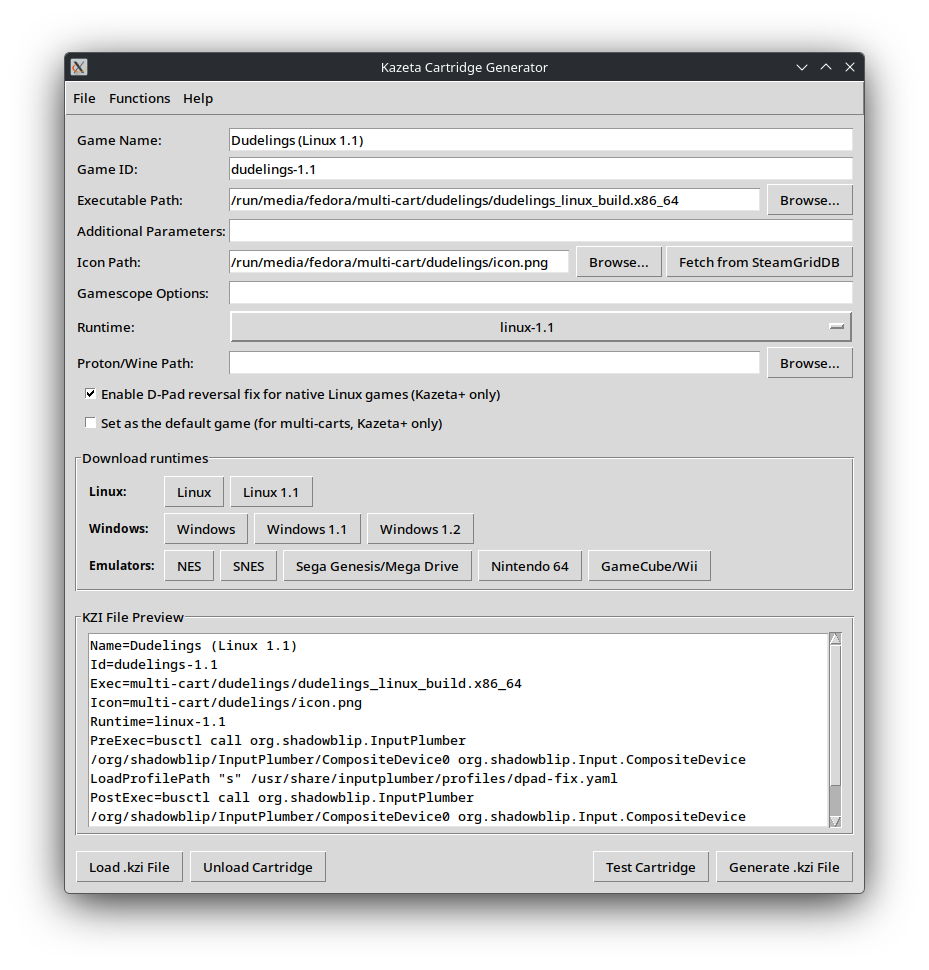
It’s all fine and dandy if you want to manually edit these files yourself with a text editor. But I thought it would be a little more user-friendly if there was a GUI you could use to do the same thing. As such, I made KZI Cartridge Generator. This is an app you can use on your desktop PC to create cartridges for either Kazeta or Kazeta+. However, some features are only available with Kazeta+, such as applying the D-pad reversal fix.
A neat thing with KZI Cartridge Generator is you can test a native Linux game, or a Windows game, on your desktop PC, to make sure it works before playing the game on your Kazeta system. When testing a Windows game, by default your distro’s Wine package is used. But you can also use GE-Proton or whatever other compatibility layer you want! You can download runtime files – be it the official Kazeta runtimes, or Kazeta+ runtimes – directly to your removable media. Based on the testing so far from some individuals on the Kazeta Discord, it seems the Kazeta+ runtimes are backward-compatible with vanilla Kazeta. Users can also fetch icons for their games via SteamGridDB – I’ve found this to be a lot faster and convenient as opposed to finding an icon yourself and resizing it to 32x32 or 64x64 px.
As time went on, and more features were getting added to Kazeta+, I expanded the support of KZI Cartridge Generator to handle multiple functions. In addition to making .kzi files, the application can now also allow the user to create their own runtime files, compress their games, burn CDs and DVDs, and create themes for the Kazeta+ BIOS. KZI Cartridge Generator has thus evolved into the ultimate Swiss-army knife for all things Kazeta and Kazeta+, all neatly wrapped into one package.
In the event users want to manually do all the work themselves, I’ve also documented everything in the Kazeta+ Wiki, from compressing your games, making your own runtime files, making your own themes, or creating your own optical media.
The Development Process⌗
Don’t give me too much credit here. I’ve kitty-scripted with Bash and Python, but nothing along the likes of Rust (that’s the programming language used by the Kazeta BIOS). For this, I used AI for the programming. In this particular case, I went with Google Gemini. Gemini did 95% of the coding for me; it added all the Bluetooth features, the framework for theme support, the logic for handling multi-carts, you name it. For the most part, it was just a copy-pasta process, copying the code Gemini generated for me, putting it into the appropriate Rust module, and just pasting any runtime errors to the AI in the event the BIOS didn’t compile. The remaining 5% was me double-checking the code for any errors or typos, simplifying the import module code, adding comments, and testing the code Gemini sent me. I likewise did the same with KZI Cartridge Generator. I’m actually quite amazed that it was able to do all of that.
Even the splash screen video that starts when the console is turned on – I was able to make it with Google’s Veo, built right into Gemini. All I had to do was give it the Kazeta+ logo as the baseline, and told it, “Make a Dreamcast-esque intro sequence with this.” And it made it!
Aside from the odd, abrupt change that the logo does when it’s spinning around and going in reverse, I’d say this is pretty solid.
That being said, there were definitely some infuriating moments working with the AI. Obviously, you can’t trust it word-for-word. Gemini might say to you, “Replace your existing logic with this:” and output some random code that it’s pulled out of its arse. Sometimes, it has no idea what it’s talking about if you aren’t specific enough with it, and if you try to run the code as-is, without commenting out your old block of code as a backup, you’re probably going to break your entire project. In some instances the AI will also stubbornly insist “This is the solution!” when clearly it is not. Doing a rm Cargo.lock followed by re-building the project with cargo build is not going to fix a dependency issue. You’re forced to create a new thread with the AI so it doesn’t go off the rails.
So, you have to be very careful about what kind of code you’re putting in, and herein lies the human “touch” needed to ensure nothing breaks. Despite the concern that AI is taking over programmers’ jobs, there still needs to be at least one human being there, overseeing the code, to make sure nothing goes haywire.
I Need More Testers⌗
I’ve had a few users on the Kazeta Discord test Kazeta+ for me. But I’d like to add a few more to the list. If you, the reader, are willing, you can head over to the installation Wiki page to get started. At some point I’d like to make an ISO for Kazeta+, but for now, you’ll have to upgrade your existing Kazeta install.
I’ve opened the issue tracker, so please let me know of any errors you come across, or new features you’d like. I’d also love to hear your experience in general with Kazeta+!

Acknowledgements⌗
First of all, credit of course is due to Alkazar for laying the groundwork for the Kazeta project. I would not have been able to expound on his ideas had he not made Kazeta in the first place. I also need to give him credit for being the original person to add compressed .kzp file support, for which I had expanded on in Kazeta+.
Shoutout to my testers, who have patiently stuck through the issues that they came across and reporting them to me:
- Calyder
- SynnBunn
- Ashthorne Gaming
- lewattoo
Credit also goes to:
- CatsGoMoo: for providing the original implementation for CD/DVD support
- Loratadine Niacin: for providing runtimes for PC Engine, PlayStation 1, Sega Saturn, and Sega CD
- Kuro_Nankin: for helping me figure out how the heck to slap a sticker label onto a CD