Kazeta - Bringing Back The Good Ol’ Days of 90s Consoles

As someone who grew up in the 90s, I’m an absolute sucker for that decade. From the birth of nu metal, to Nintendo being bullied for the first time in the console market, to 3D graphics realizing their full potential and transforming the games we played into a far more immersive experience. Where it felt like technology was at the right balance between being useful, but not controlling our lives, since we didn’t have the distractions of our smartphones or social media.
What I would consider to be the true “golden age” of video game history was the sixth generation – as I had described in my GameCube-lookalike Steam Deck post. But the generation that had preceded it – the Nintendo 64, the PS1, and Sega’s various failed hardware projects – was where the fierce competition had taken its roots. Not just with Sega, but newcomers like Sony who were entering into the picture and were already proving to become the next big hit.
I remember being at my sister’s house, huddled up with my nephews in the basement, in the late 90s (maybe early 2000s). There was our entertainment device – the Nintendo 64. Man, does that console bring up some pleasant childhood memories. Pinching Mario’s nose when booting up Super Mario 64, then sitting at the file select screen for ten minutes just to listen to the background music; skating through the warehouse in Tony Hawk’s Pro Skater; the meme “do a barrel roll!” becoming a thing with Star Fox 64; holding the weird, three-pronged controller that couldn’t let you use the D-pad simultaneously with the analog stick. Taking the cartridge out and blowing on it in the event the game didn’t boot – which, in case you weren’t aware, actually made the problem worse, since the moisture from your mouth could contaminate the pins. Then crying because one day the Golden Retriever decided to chew the AV cables up.
Modern gaming – be it on a PC or even a console – has evolved into something much more than just inserting a disc and playing it. Some consoles don’t even have a disc drive anymore. Now there’s multiple logins that you have to deal with, multiple launchers, complex UI structures that can confuse casual gamers, distractions like social media feeds…you know what I’m talking about. Sometimes I wish we could just re-live the simplicity of those days.
Oh, wait. It looks like my dream has been answered. That is, Kazeta.
![]() Image credit: Alkazar
Image credit: Alkazar
Czech for “cassette”, Kazeta is a brand new project spearheaded by Alesh Slovak, AKA Alkazar, who’s also the primary meat and potatoes behind ChimeraOS – the spiritual successor to SteamOS 1.0/2.0 that turns your PC into a console-like device. Seeing as Alkazar has over six years’ worth of working on a gaming-focused distribution under his belt, he would definitely make the ideal candidate for making something like this.
Kazeta is a barebones, Arch-based Linux operating system. The concept is simple: you add a game to an external media, be it a SD card or USB flash drive, insert it into the computer, turn the power button on, and begin playing the game. It’s that simple.
Or, at least I wish it was that simple. As I’ll get into this review, while the foundation is there, Kazeta frankly needs some more time in the oven before it’s ready for prime time.
Why It Was Made⌗
I highly recommend giving the interview by PerfectDark a read. This provides us with some insight into the roots of why Alkazar built Kazeta:
In recent years I started playing retro games on original hardware. Over time I started adding more and more consoles and eventually got to playing some modern ones…These were just awful experiences compared to the older consoles. You needed accounts and online connections and you had to install games that took forever. I had just assumed modern consoles were a good experience, but they were barely any better than the PC gaming experience. Sometimes worse.
As such, he asked himself, “Why can’t we have the immediacy and simplicity of the older consoles?” Thus, the idea of creating his vision was starting to form. You’ll also notice some of his other reasons on the r/linux_gaming announcement thread, including ChimeraOS users having difficulty navigating Steam’s navigation system, and wanting to bring back the nostalgia of physical hardware.
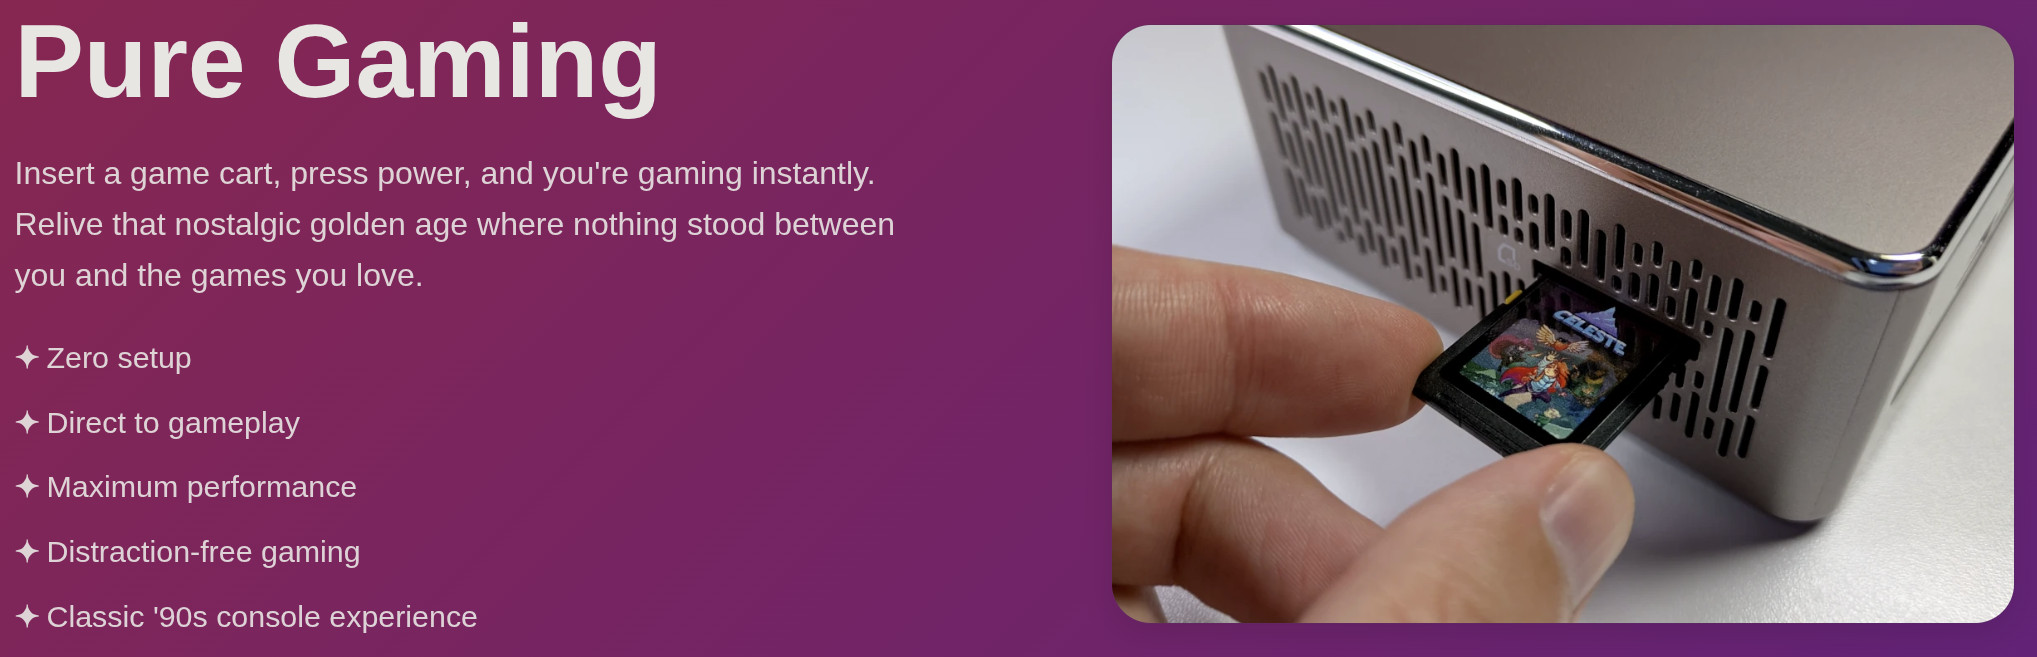 Image credit: Alkazar/official Kazeta website
Funnily enough, Alkazar told me that there would only be “dozens” of Kazeta users before he launched his project into the world. But based on the amount of upvotes on the r/linux_gaming thread (over 500 at the time of writing this), the Kazeta Discord exploding overnight with more than 400 members, and media outlets like PCGamer spreading the buzz, it’s pretty clear that I’m not the only one who’s excited for a project like this. If anything, there are at least hundreds, probably even thousands, of users who are sick of the modern, digital age of gaming.
First-Time Setup⌗
You’re going to want a dedicated PC for this, as dual-booting is not supported. Neither are hybrid graphics, so you might have limited success if you’re using a laptop with a dGPU. Mini PCs are the recommended device. Currently, the only officially supported hardware, according to the Kazeta Wiki, is the Geekom A5 2025 Edition Mini PC. Obviously, you’re also going to want a keyboard for first-time setup, as well as a couple of extra SD cards or flash drives that you plan on booting your games from.
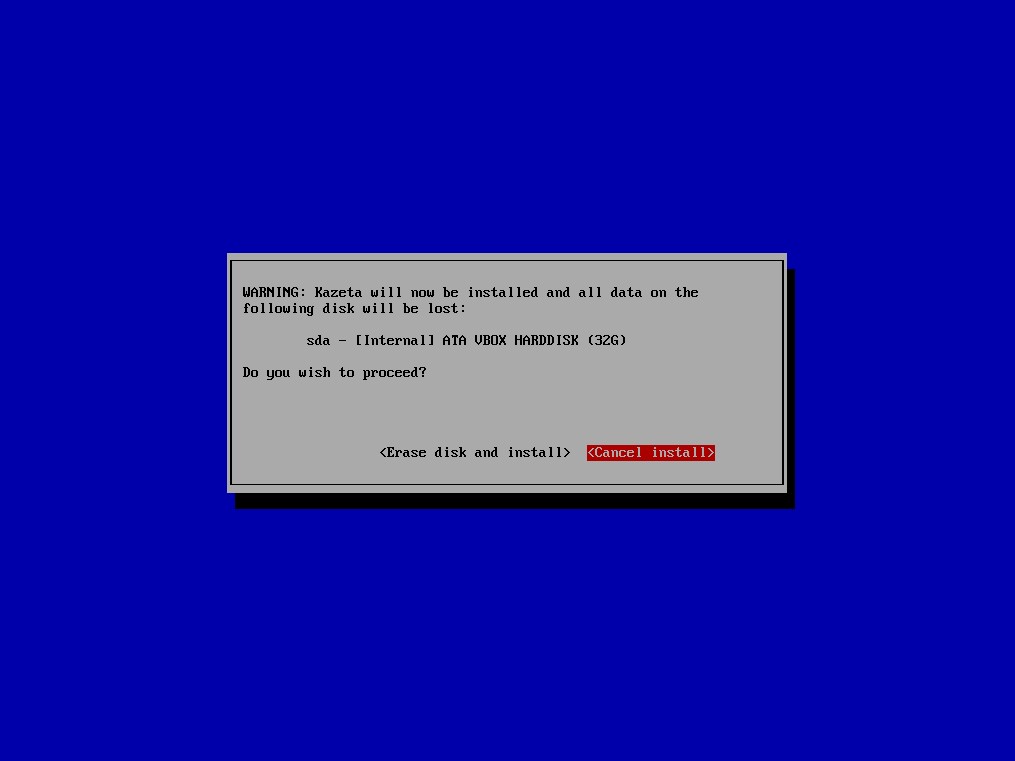
Upon heading to the official Kazeta website, there is a download link to a 2.5 GB .ISO image, which you can then flash onto a USB drive. Simply plug the USB flash drive into the computer you’re planning on using Kazeta with and boot from it. If you’ve used the ChimeraOS installer, the blue screen of death background will be familiar here. The installer will detect the internal hard drive and warn that everything on it will be formatted. From here, you can choose to proceed and install the operating system, or exit. Interestingly enough, if you have a gamepad connected, you can navigate the different options with the D-pad or left analog stick, so you might not even need to connect a keyboard.
Installing Kazeta took roughly three or four minutes on a NVMe SSD. Everything is included in the installer, so no Internet connection is required. Once complete, you can choose to restart the computer, or use the command line.
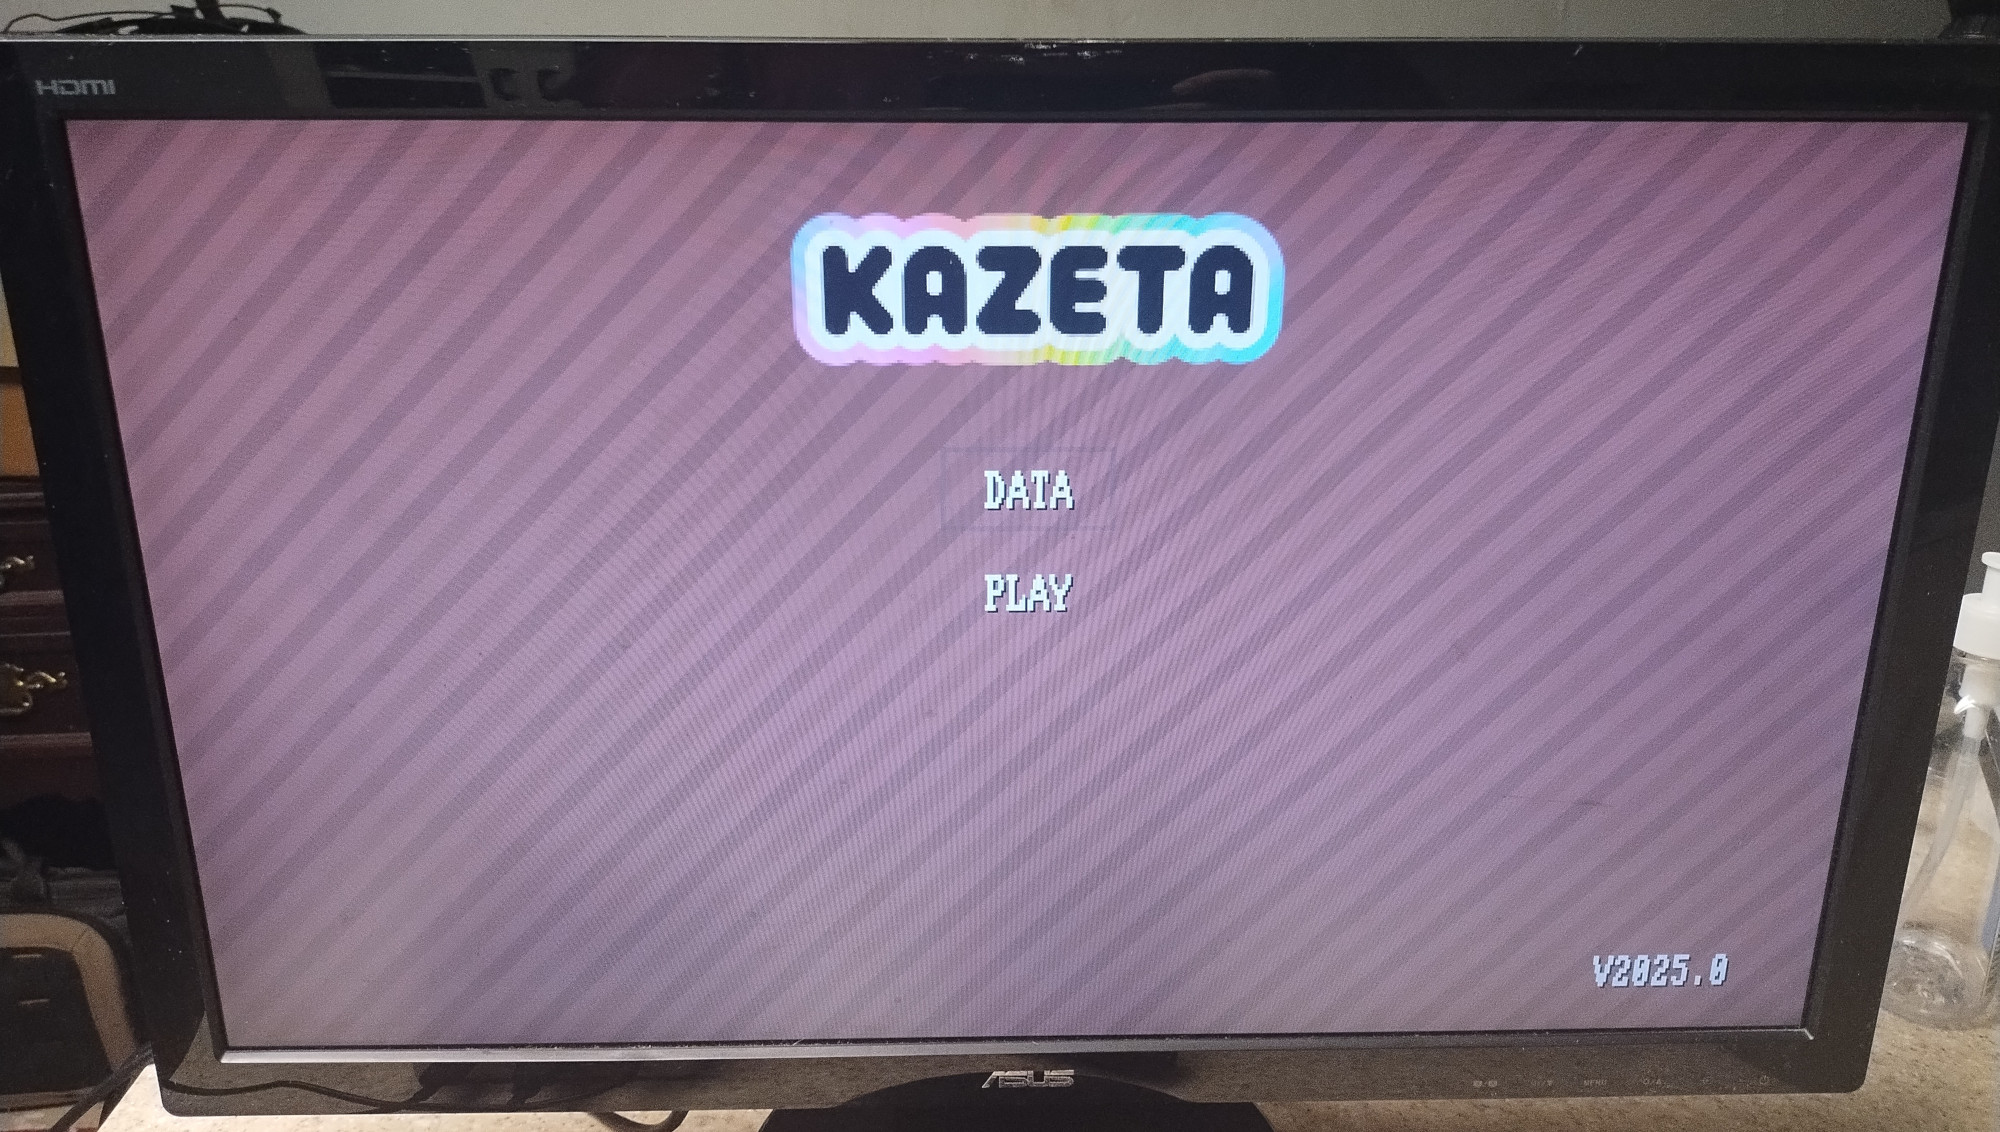
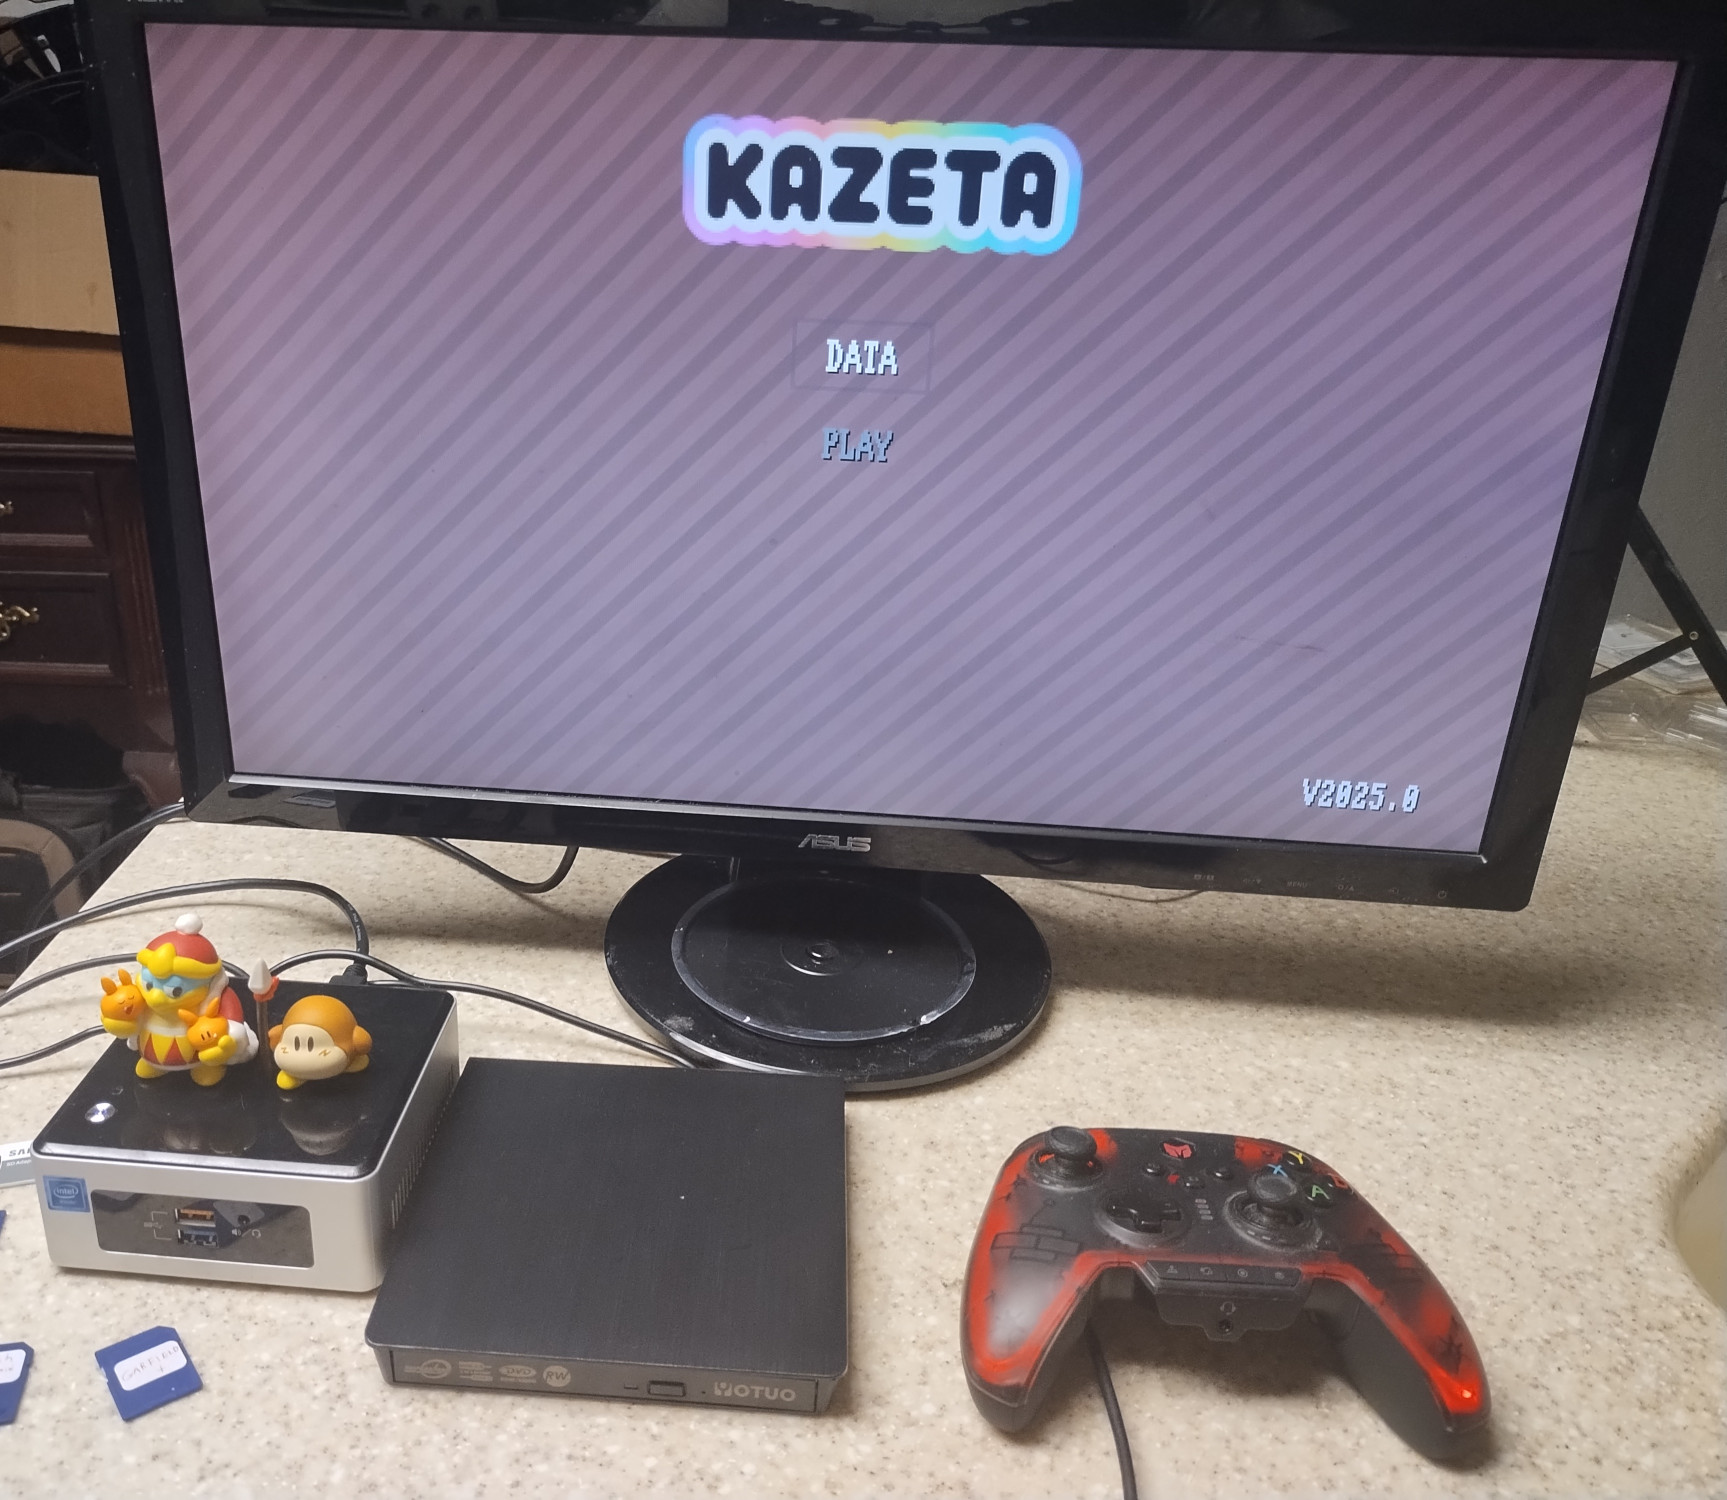
Once Kazeta is installed and rebooted, you’ll be greeted with the Kazeta BIOS (provided that you don’t have a “cartridge” inserted). If you like retro-inspired interfaces, you’re going to like this. From the font, to the sound effects that are played when navigating the different options, to the slowly-changing color of the background, it’s all here. Alkazar mentions in his interview with PerfectDark that the PS1 in particular was the inspiration for the design of the interface:
I have a particular fondness for the PS1 BIOS as that was an influential console that I had back in the day and is the system I think of when I think of a console with a BIOS. I do also really love the fun animations of the Dreamcast BIOS.
From here, you can manage your save data with the individual cartridges that you’ve made, or boot your cartridge once it’s been inserted.
Once you’ve created some carts and have booted from them, the data management screen will populate with save files associated with those games. The icons that show up will be whatever PNG image you stored on it. From here, you can delete your saves, or copy them to an external media.

Setting Up Cartridges⌗
Setting up an external media storage device as a “cartridge” requires a separate computer and a little bit of work. Let’s say you’re setting up a SD card. Alkazar recommends getting a card that’s Class 10 or higher, since anything lower can result in very slow reading and writing times. I bought a 5-pack of 32 GB cards from Amazon. For labels, I bought a pack of removable labels. The labels are useful for when I have multiple SD cards lying around, so I can distinguish which card contains what game. If you want, you can use a custom sticker printing service to get some fancy artwork for your games, but since I’m cheap and impatient, I went with what I got. If I was desperate enough, I can just draw some artwork myself on the labels.
Oh yeah, I actually did that…
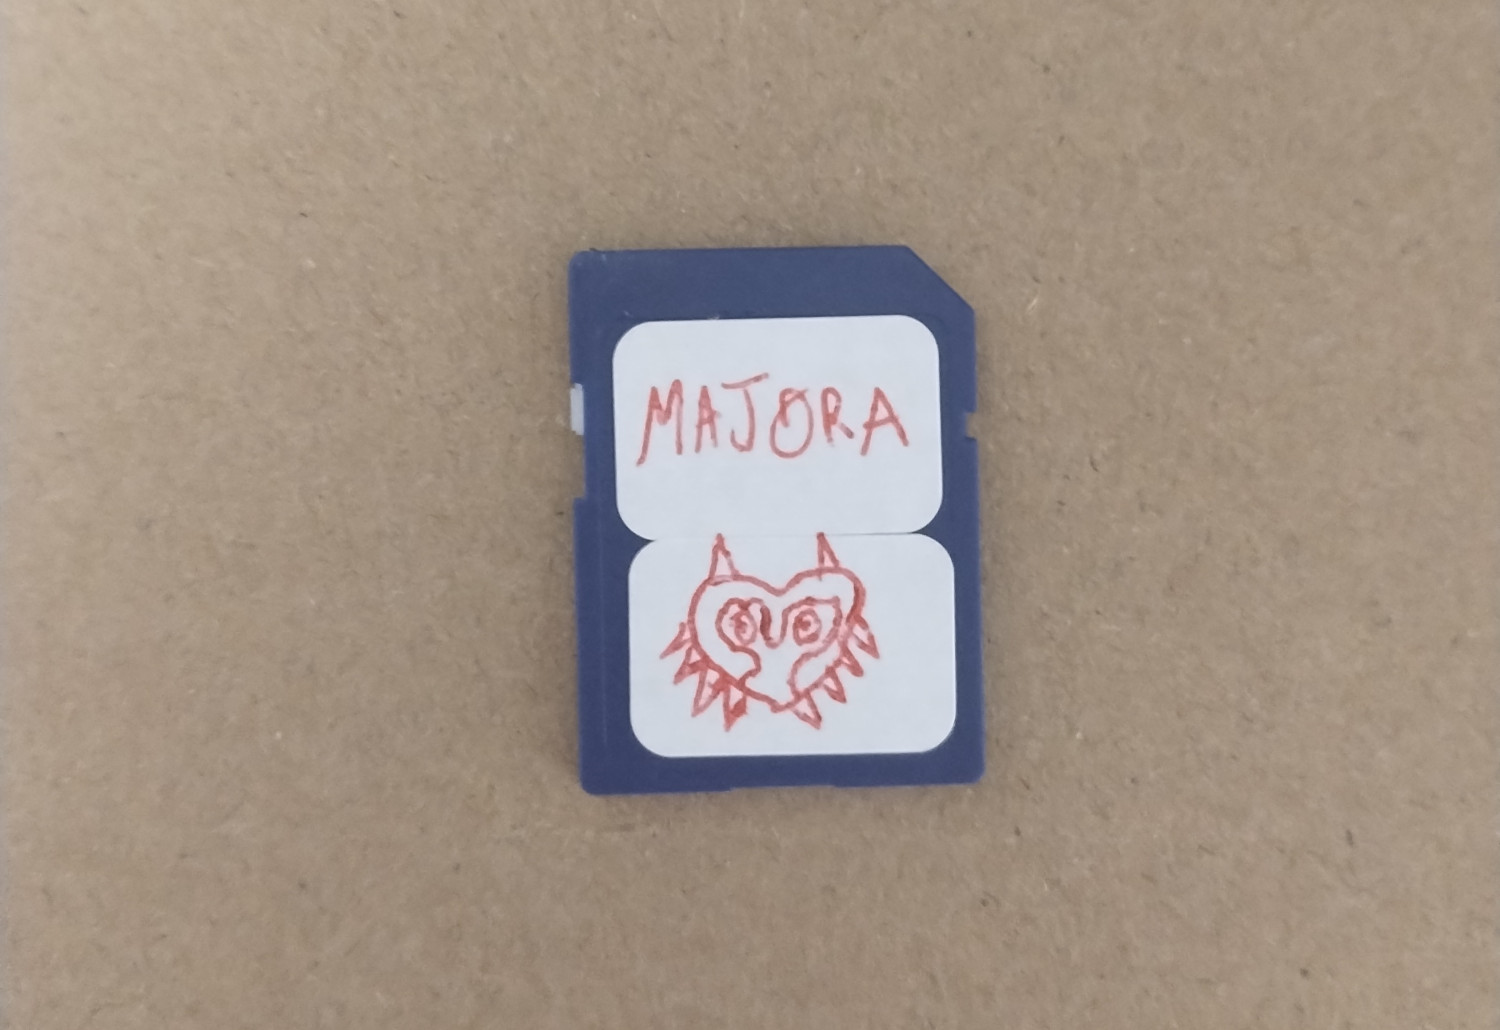
Note that, in addition to SD cards (whether they’re full-size or MicroSD), you can also use USB flash drives as your cartridges. In the event anyone was curious about CD/DVD functionality, based on my testing so far, unfortunately it doesn’t seem to work. I had made an ISO of 2ship2harkinian (Majora’s Mask PC port) and burned it to a blank DVD+R. I connected my portable disc drive to my USB-C dock on my Steam Deck, as well as my Intel NUC. The “PLAY” menu item doesn’t light up in the Kazeta BIOS. At least the disc tray has power, since I can open and close the tray with the button on it. Alkazar has mentioned that he wants to add this functionality in a future update, so look forward to that!
You’ll need to format the cartridge as ext4. The reason why this particular file system is used, as opposed to, say, BTRFS, is explained by Alkazar on the Kazeta issue tracker:
BTRFS…is not an ideal filesystem for external media like SD cards and USB flash drives due to the heavy amount of writes.
The goal is to avoid writing any data to the cartridge, to extend the longevity of it:
The cartridge itself is never written to. This is to ensure the game data remains pristine, and to prevent wear on the storage media itself. To capture any changes, such as game save data, a writable overlay filesystem is applied on top of the cartridge. The contents of the overlay/save data are stored on the systems internal storage.
Once you’ve formatted the cart, you can place the game – which has to be DRM-free – onto it. Ideally you would want to put the game executable and related files inside of a “content” folder. The game can be a native Linux executable, a Windows game with the use of the Kazeta Windows runtime file, or even a ROM, provided that you have the emulator supplied with it. You’re also going to want an icon for the game, which will show up in the Kazeta save management screen, saved as a PNG file that’s either 32 x 32 pixels or 64 x 64 pixels. If you need to use a runtime (in the form of a .kzr file), you’ll need to save it onto the root of the cartridge.
Finally, you’re going to need to provide Kazeta a metadata file (.kzi) that tells it how to launch the game when the console is booted up. This text file will provide the name of the game, the game ID, the execution parameters, the icon file path, and what runtime to use. Since Kazeta uses GameScope, you can also optionally specify any GameScope parameters that you want to use. This can be useful if, for example, you want to set a specific resolution for the game, or use a certain scaling algorithm. In most cases though you’re probably not going to need this.
I’ll give you an example of what a cart.kzi file might look like. This is for Dudelings, a native Linux title:
Name=Dudelings
Id=dudelings
Exec=content/dudelings_linux_build.x86_64
Icon=icon.png
Runtime=linux
So, at the end of the day, my “cartridge” would look like this:
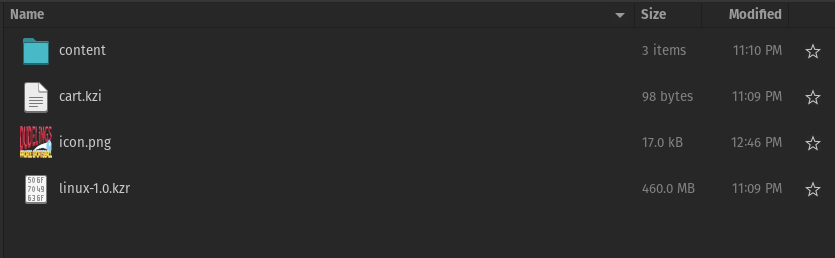
And inside the “content” folder would contain the game’s executable file and all of the related files needed to get it to run:
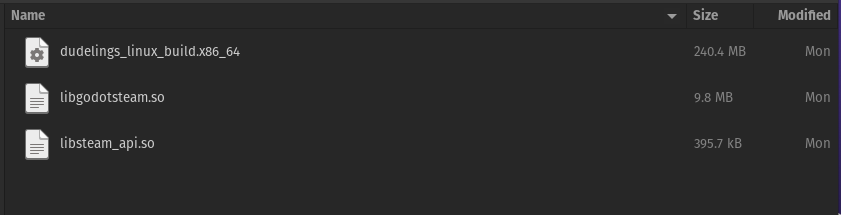
I vibe-coded a graphical interface that should make your life a little easier when it comes to generating the .kzi file, but still, you’re responsible for having the necessary files in place.
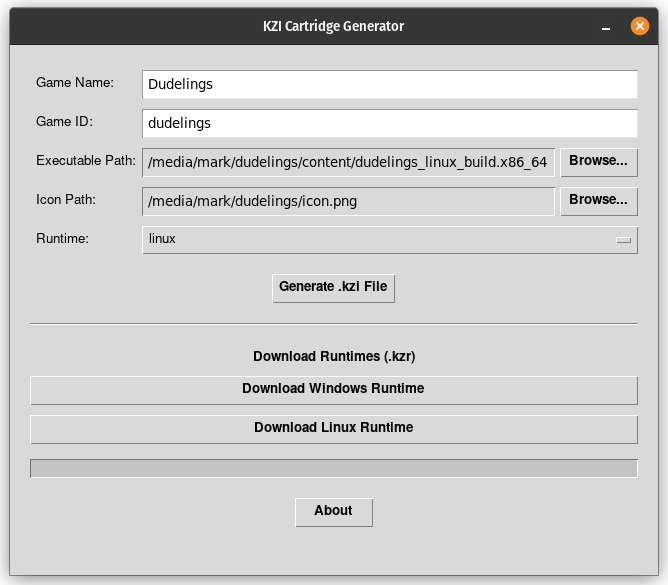
So yeah. Not super seamless. And even then, you might not be able to get the cartridge to boot on your Kazeta machine. Which leads me to my next point…
Troublesome Troubleshooting⌗
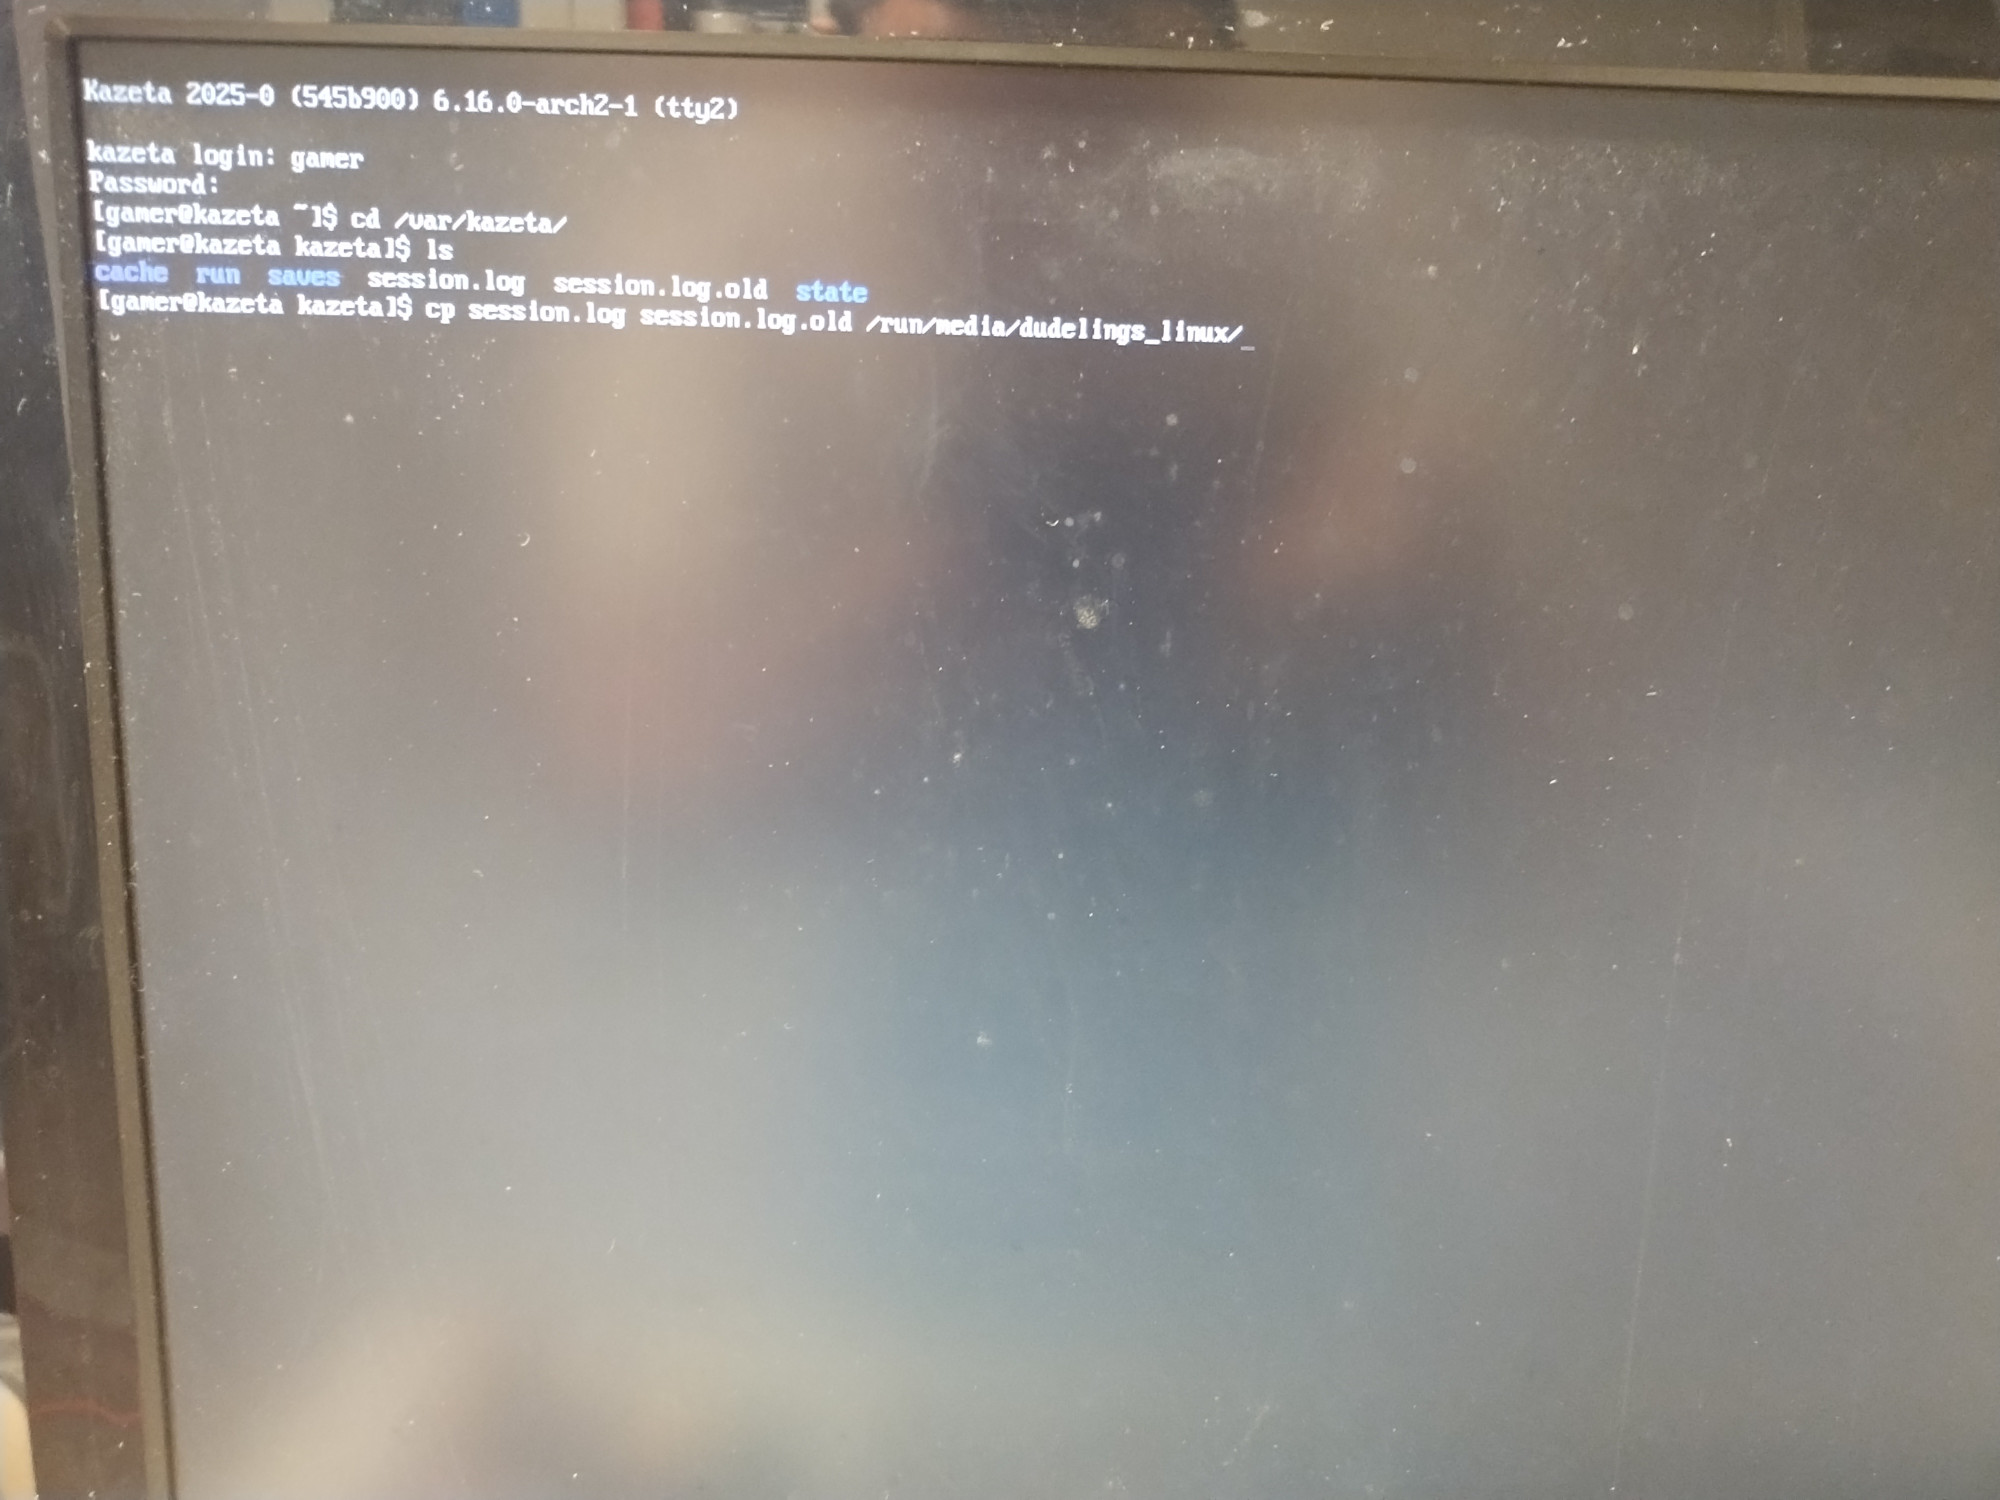
If you insert a cart into Kazeta, turn the system on, and nothing happens, it’s probably because Kazeta wasn’t able to boot it. A couple of error logs get dumped onto the internal hard drive, but you have no way of being able to view them. So, what you have to do is…
- Boot Kazeta without the cart.
- Put the cart back in once you see the BIOS.
- Attach a keyboard, hit CTRL + ALT + F2 to bring up the command line interface, and login with a username and password of
gamer. - Copy the session and game logs onto the cart. So you might type something like
cp /var/kazeta/session.log /run/media/<name of your cartridge label>. The folder structure gets even more complex to get the game log, as it’s buried in/var/kazeta/saves/default/<game id>/.kazeta/var/run.log. - Attach the files to the
#helpchannel on the Kazeta Discord or the Kazeta GitHub issue tracker and see if Alkazar can help narrow down what the problem is.
This is very cumbersome. For a distro that’s designed with non-technical gamers in mind, this is the polar opposite. In a future update I definitely want to see this troubleshooting process more streamlined. Kazeta should present a screen with something like “Kazeta was unable to boot the cartridge. Error logs have been stored on it. Press A to shutdown.” Maybe even have a wall of text that reads off the session log. But definitely at least dump the error logs onto the cart, so the user doesn’t have to manually do it themselves with a keyboard.
Testing on Different Hardware⌗
Kazeta actually inspired me to dig through several boxes of unused stuff that I had lying around to find an Intel NUC that I had bought seven years ago. With a single-core Celeron processor and a max clock speed of 2.16 GHz, along with 8 GB of DDR3L RAM clocked at 1,600 MHz, it’s kind of a joke to use this mini PC outside of lightweight web browsing or using an office suite. Still, I was kind of shocked to see that I was able to install Kazeta on it and run Dudelings. It runs like crap, there’s no sound, and there’s awful screen tearing (likely due to GameScope not being compatible with such an old processor). But it works.
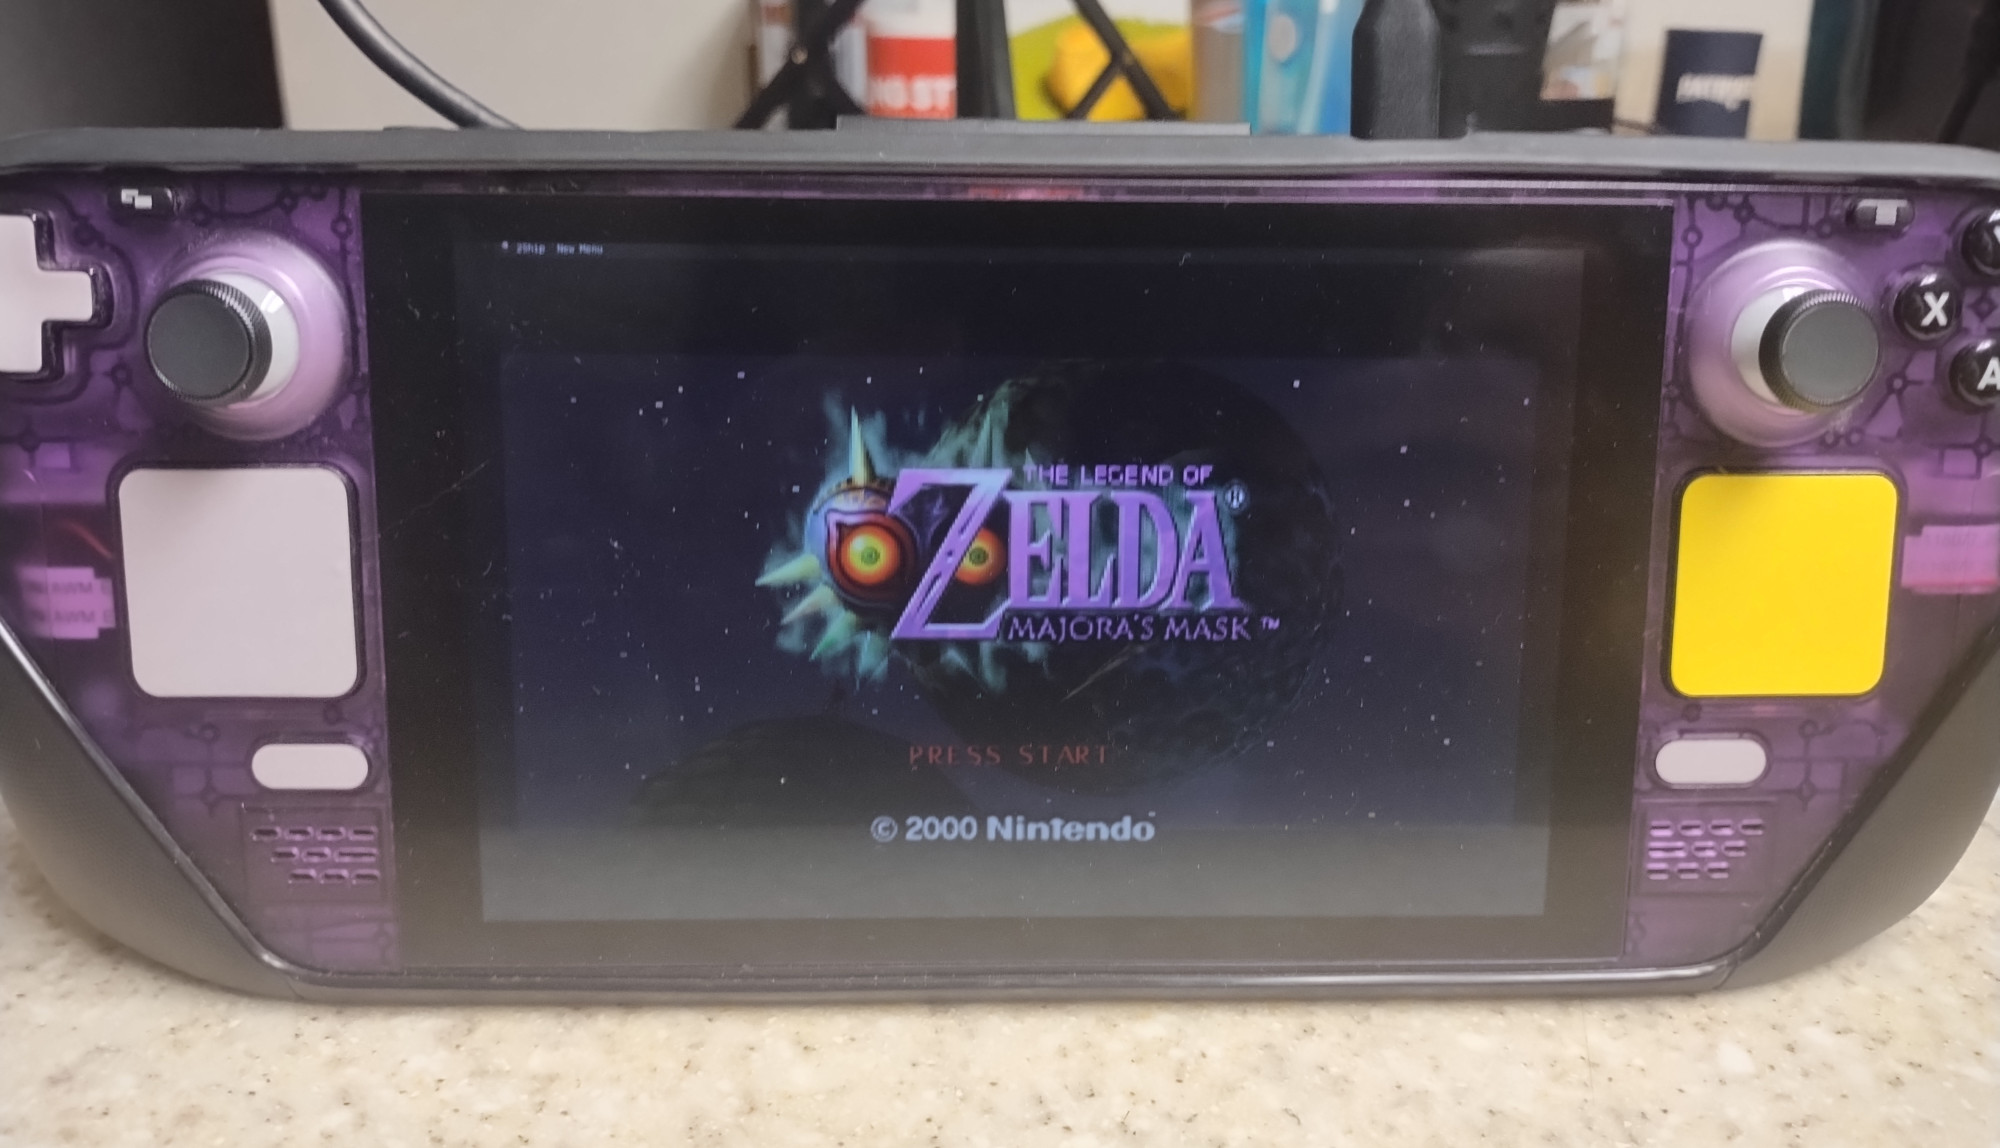
Since I don’t have any other dedicated PCs available to test with, I next tried my Steam Deck. One good thing I will say about hardware requirements, is that you really don’t need that big of an internal hard drive, since the only data Kazeta stores on the drive – other than the OS itself – is the save files for your games. As such, I was able to make good use of the OEM 64 GB NVMe SSD Valve shipped to me when I ordered my Steam Deck. I replaced the off-the-shelf 512 GB NVMe drive that I had SteamOS on, and put the OEM drive back in. I plugged in a USB-C dock to the Deck, put a flash drive in it, and was able to install Kazeta without issue, albeit for the screen being in portrait mode during installation. Since Kazeta makes use of GameScope, the screen automatically rotated itself back into landscape mode when Kazeta launched into the BIOS.
I was able to make use of a MicroSD card and put Super Mario 64 (PC port) on it. I put it into the Steam Deck, and low and behold, my childhood game is working perfectly fine on the handheld! I didn’t have to re-configure any of the controls. The volume rocker doesn’t work, but I can faintly hear the in-game sound effects through the Deck’s speakers. Alkazar doesn’t recommend using handhelds though.
Linux Games – Your Best Bet⌗
I’ve had the best success rate with native Linux games. In some cases I haven’t needed to supply the Linux Kazeta runtime file – like with the Super Mario 64 and Majora’s Mask PC ports. In other instances, like in the case of Dudelings, supplying the runtime file was necessary, otherwise the game wouldn’t boot.
Even then, however, you might find that your controller inputs aren’t to your liking. I’ve noticed in Dudelings that, no matter what controller I use, the D-pad directions are reversed, even though the left analog stick works as intended. Doki Doki Literature Club gave me a performance warning and that it was using software rendering. None of the buttons for the gamepads that I’ve tried will advance the in-game dialogue, but oddly enough, I can use the mouse cursor with the Steam Deck trackpads and click on them to advance the story.
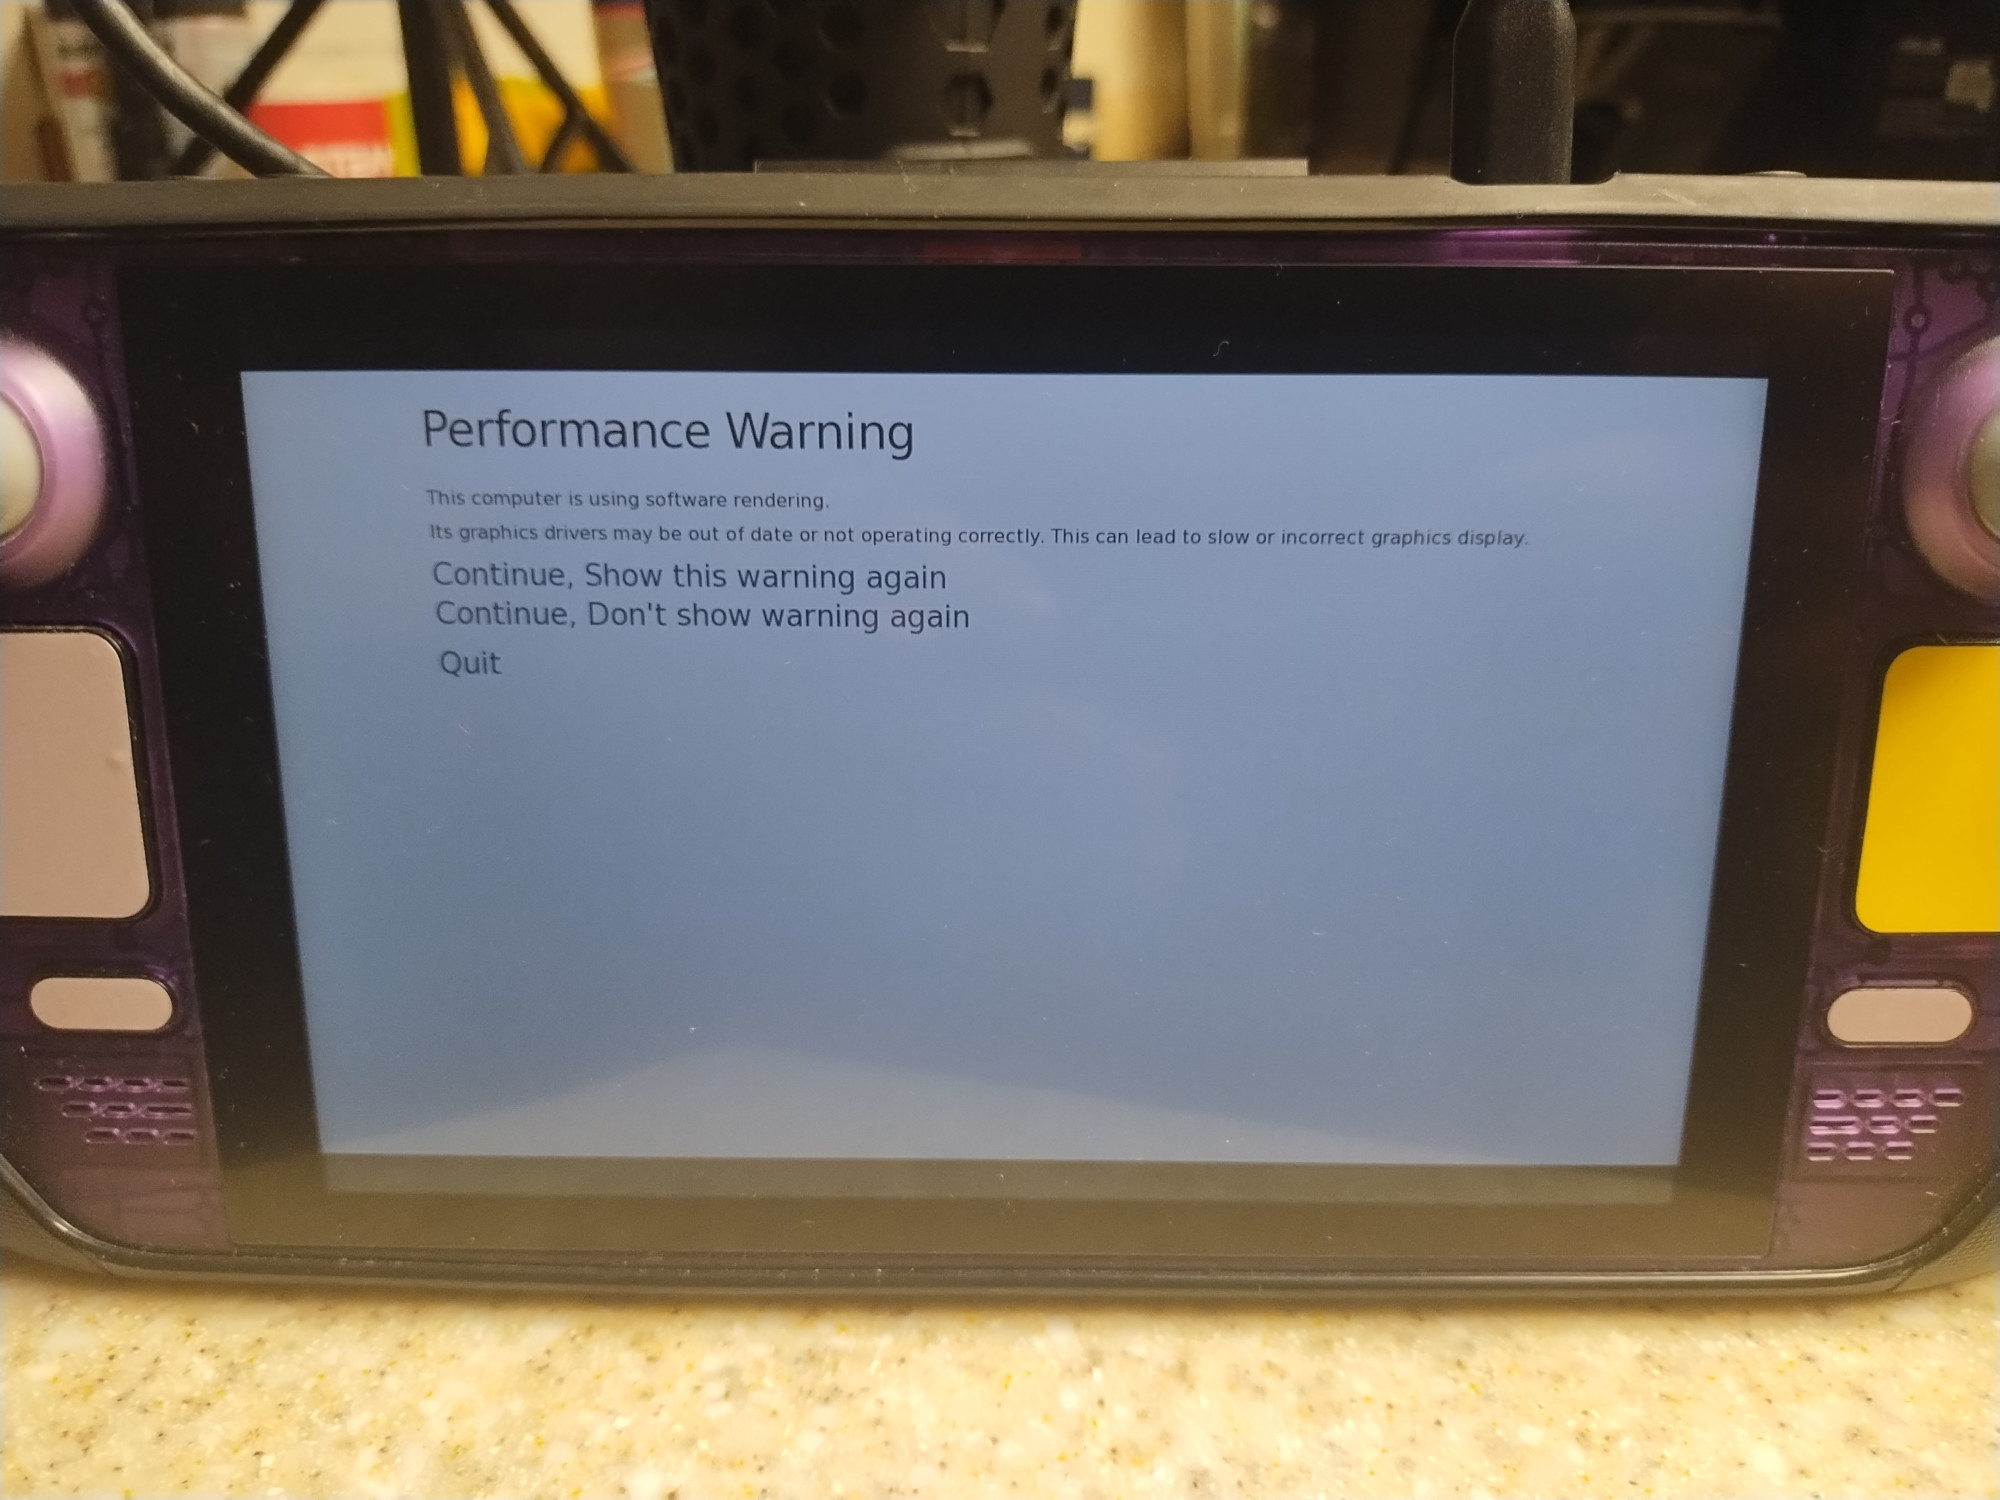
If the game you’re running has a portable controller configuration profile, you might be able to modify it and see if it changes anything. Otherwise, if your gamepad controls don’t work as intended, you’re kind of out of options.
Windows Games – Not Great⌗
I’m not sure if it’s just me, but I’ve had very limited success running any Windows games. Alkazar claims Windows games work just fine with Kazeta. I’ve tried the following games:
- the Celeste 64 sample cartridge found on the Kazeta Wiki
- Doki Doki Literature Club Plus!
- Dudelings (Windows version)
- Boomerang Fu
- Garfield+
The only one that works is Celeste 64. The initial launch window with Garfield+, where it asks the user for any graphical settings they’d like to adjust, will show up when booting that cart, but the computer just shuts off after that. The rest of the games simply won’t boot, no matter what I do. And even after sending Alkazar my session logs, the only potential conflict that he found was that there might be an issue with the save data with Dudelings, since I switched back and forth from the Linux and Windows versions. Deleting the save data did nothing.
Emulation – Some Work Needed⌗
Hopefully you’re comfortable using RetroArch with its complex menu structure. Because, if you’re going to want to emulate any ROMs, you’re going to want to head over to the official RetroArch website and download the AppImage. You’re next going to have to run the AppImage on a separate computer and download the cores that you want to use. Then you take the AppImage – along with the RetroArch-Linux-x86_64.AppImage.home folder associated with it – put it on your cartridge, put the ROM somewhere on it, and then supply the necessary parameters in the .kzi file to get RetroArch to run the game with the appropriate core. Here’s an example of what my .kzi file looks like when trying to run Smash Remix – a mod for Super Smash. Bros 64:
Name=Smash Remix (v2.0.0)
Id=smash-remix
Exec=content/RetroArch-Linux-x86_64.AppImage -L content/RetroArch-Linux-x86_64.AppImage.home/.config/retroarch/cores/mupen64plus_next_libretro.so content/smashremix2.0.0.z64
Icon=icon.png
The Exec parameter tells Kazeta to run the RetroArch AppImage, load the Mupen64 Plus core, and then load the ROM. No runtime file is necessary.
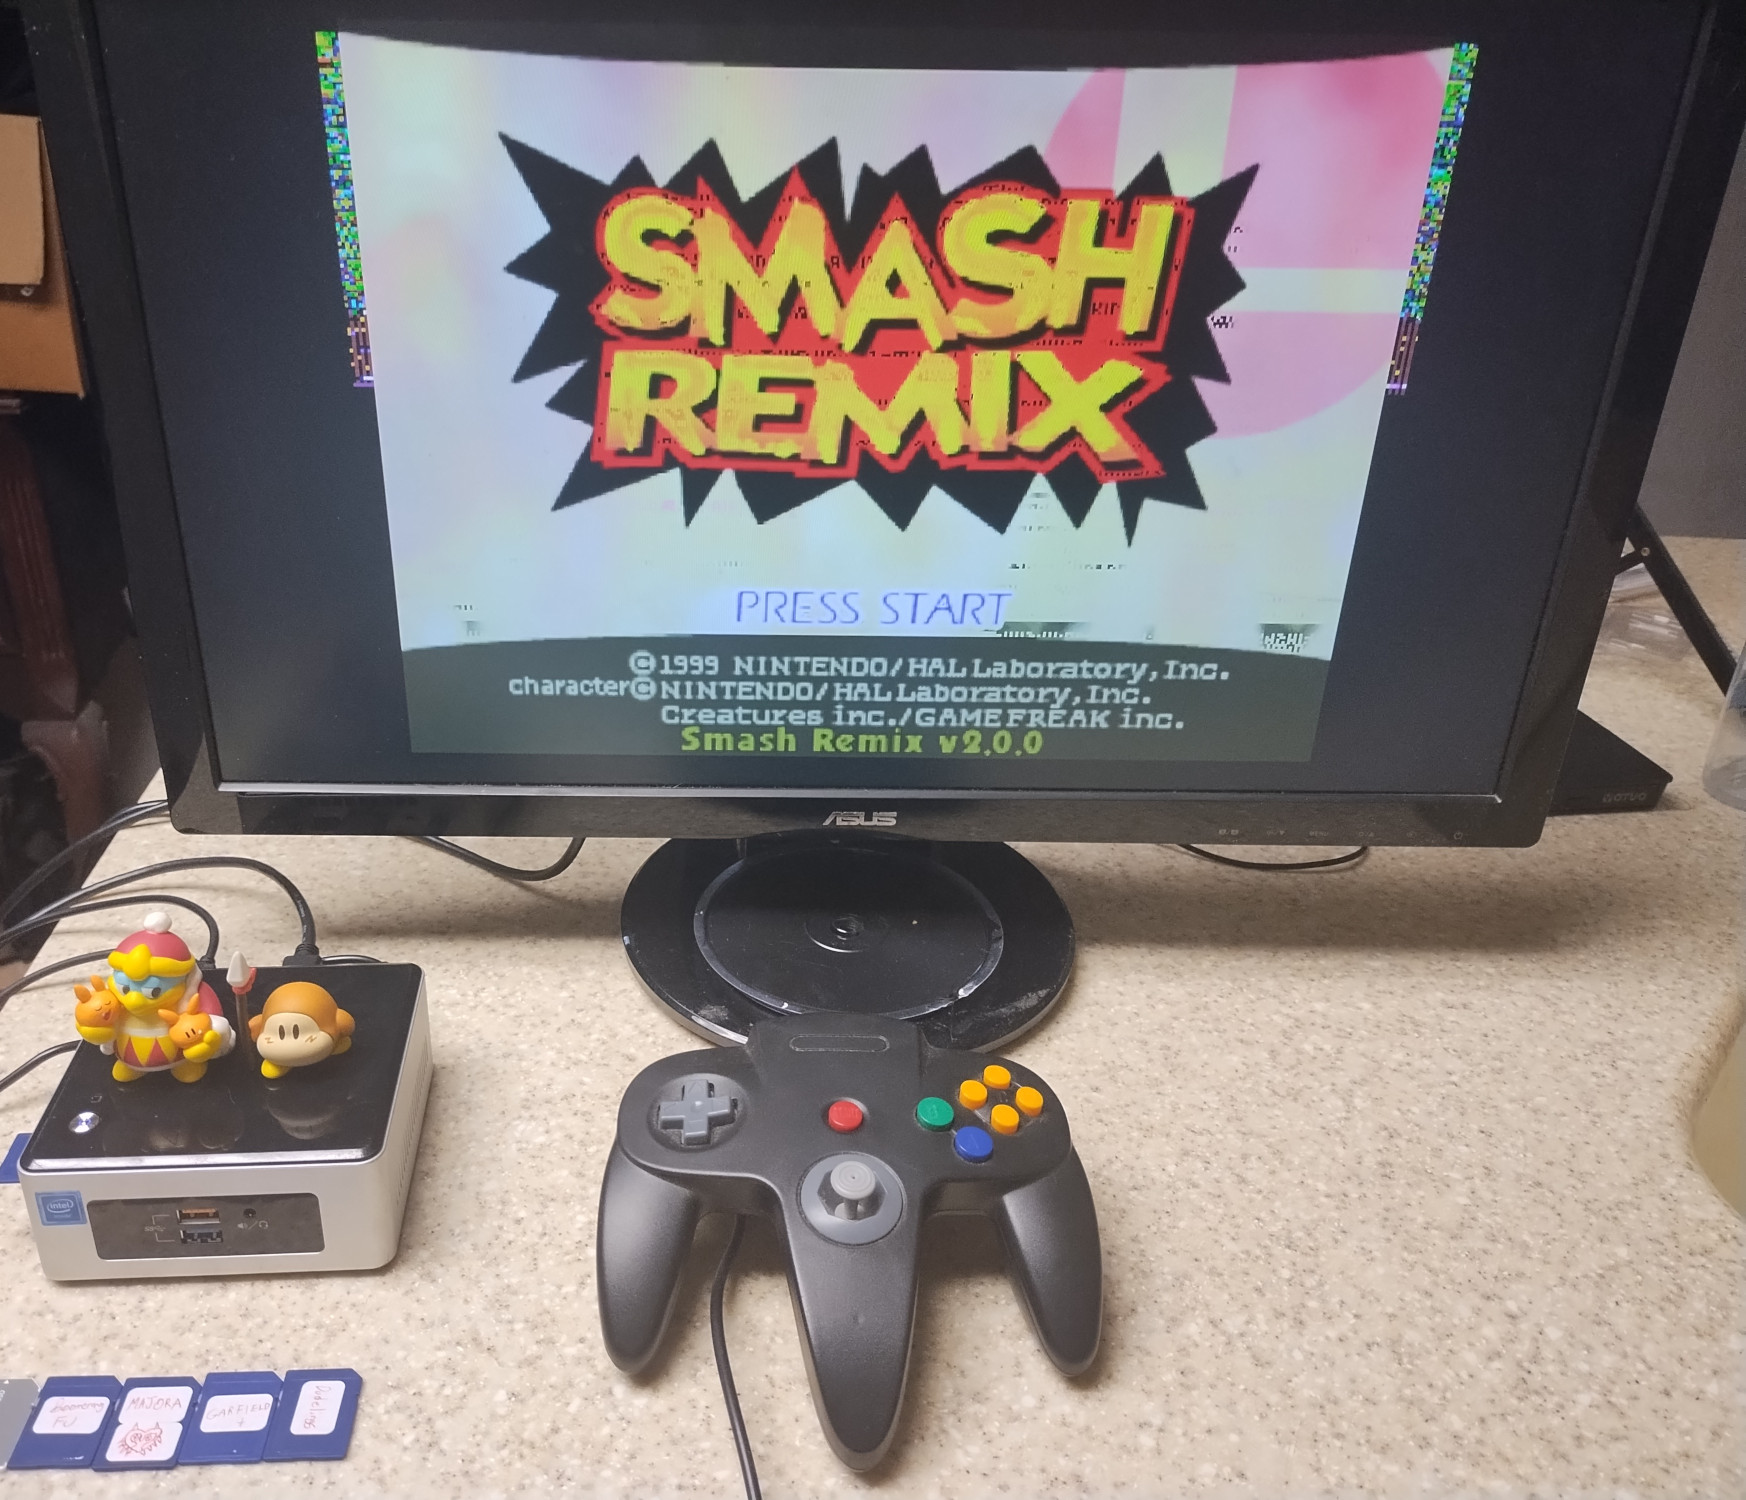
This will immediately load up Smash Remix once the cartridge is inserted. Thankfully, if you press the Guide button on your controller (or the Steam button if you’re on Deck), it will bring up the RetroArch menu, so if you want to re-configure your controls, or change the video resolution and such, it’s possible.
If you head over to the Kazeta Wiki, there’s actually a runtime file for Sega Genesis ROMs. Setting your cartridge up for this is similar to how you would set up a Linux or Windows cartridge. This simplifies the emulation process, and Alkazar has plans for adding more runtimes for other systems in the future.
Discussing Features⌗
Some folks had expressed interest in having Bluetooth compatibility with controllers. While it would be a nice feature, I can see why support for it was omitted. For one, we didn’t have Bluetooth controllers back in the 90s. As such, I think implementing this would ruin the 90s vibe that this distro is supposed to give, while also taking away some of the simplicity of the way the operating system works. Second, wired controllers are the best way to go in terms of latency. Button presses on Bluetooth gamepads are going to be far less responsive.
Needs a Lot of Work – But It’s There⌗
Other than that, there’s not really much else to say here. But that’s kind of the point. You just put a cart in, turn the power button on, and play. I think my brain is so hardwired when it comes to dealing with launchers, logins, DRM, and the like that it will honestly take some time to re-adjust to the way our gaming lives were back in the 90s – much more simple.
Kazeta is a brilliant way to bridge the gap with more casual gamers or older folks who don’t want to deal with things like Steam’s complicated menu structure, or having multiple launchers to contend with and having a login for each of them. It’s also a nostalgic trip for those of us who want to preserve our physical media. A DRM-free gaming experience means we don’t have to worry about applications like Steam running in the background, neither do we need a physical keyboard to type our usernames and passwords just to play a game. An Internet-free connection means that paranoid users don’t have to worry about their data being collected.
I think someone like my older brother could benefit from this. Even though he’s a gamer, as a non-technical user, he hates his Xbox Series X. Being able to bring a mini PC to his home, plugging it into his TV, and getting right into the action by putting in a cartridge and simply turning the power button on would be of great appeal to him.
Aside from the work you have to put in to create your own carts – and the cumbersome troubleshooting that follows in the event they don’t work – the vision is there. There’s hit-and-miss compatibility with Windows games, sometimes your controller might not work the way that you want it to, and emulating titles that don’t have a Kazeta runtime requires a bit of work. Alkazar has admitted himself in the Discord that Kazeta “is full of bugs and unimplemented features” and is currently “experimental”.
That being said, I know in due time a lot of the issues I had mentioned will have either a fix or a workaround. I’m looking forward to Kazeta becoming an even more polished experience!
TL;DR
The good:
- easy-to-use installer
- DRM-free gaming experience
- physical media!
- simple plug n’ play system
- no logins
- a nostalgic trip to the 90s with the way we played games back then
- internal hard drive doesn’t need to be that big, as it only stores the operating system and game save files
- no Internet connection required
The not-so-good:
- iffy controller compatibility, without there being an efficient way to re-configure them
- Windows games fail to run 9 out of 10 times
- setting up cartridges takes a bit of work, especially when it comes to emulation
- very cumbersome troubleshooting steps that require you to use the command line
- CD/DVD playback is not currently implemented
Want to try it yourself? Head over to the Kazeta website to get started!