Top Things To Do After Getting a Steam Deck OLED

That shiny new handheld just arrived at your door? Great! While the Steam Deck OLED provides a great out-of-the-box experience, there are several things that you can do to further enhance the experience.
Increase UMA Frame Buffer Size for Better Performance⌗
By default, the UMA (unified memory architecture) frame buffer size is 1 GB. By increasing it to 4 GB, this can “help improve graphics performance in some games.” It can also prevent “missing and/or low-resolution textures.”
You’ll need to access the BIOS for this. To do so, hold the Volume+ button while turning the Deck on. Let go once you hear the chime. Go to “Setup Utility,” then go to “Advanced”. Select “UMA frame buffer size” and set it to 4 GB. Press the Back button to save changes and reboot.

Increase Swap Size and Change Swappiness Value⌗
By default, SteamOS uses 1 GB swap, and a value of 100 for swappiness. This means 1) if the Deck runs out of RAM, it only has 1 GB of swap to use, and 2) with a swappiness value of 100, the Deck will always prefer the swap over the physical RAM, giving the device a performance bottleneck since again, it only has 1 GB of swap space.
When we increase the swap file size, and change the swappiness value, we can potentially get FPS boosts depending on the game being played.
An easy way of changing the swap size and tendancy is by using CryoUtilities.

Get Plugins⌗
Decky Loader allows you to use plugins directly in Game Mode. Things that you can do with plugins include:
- install the latest version of GE-Proton (and some other compatibility tools) with Wine Cellar
- record the screen with Decky Recorder
- customize the Steam theme and sound effects with CSS/Audio Loader
- use PowerTools for fine-tuned battery control
- easily see Proton ratings for each game with ProtonDB Badges
- customize the startup and suspend videos with Animation Changer
- easily see how long a game takes to beat with HLTB for Deck
- suspend the Deck when it’s on low battery with AutoSuspend
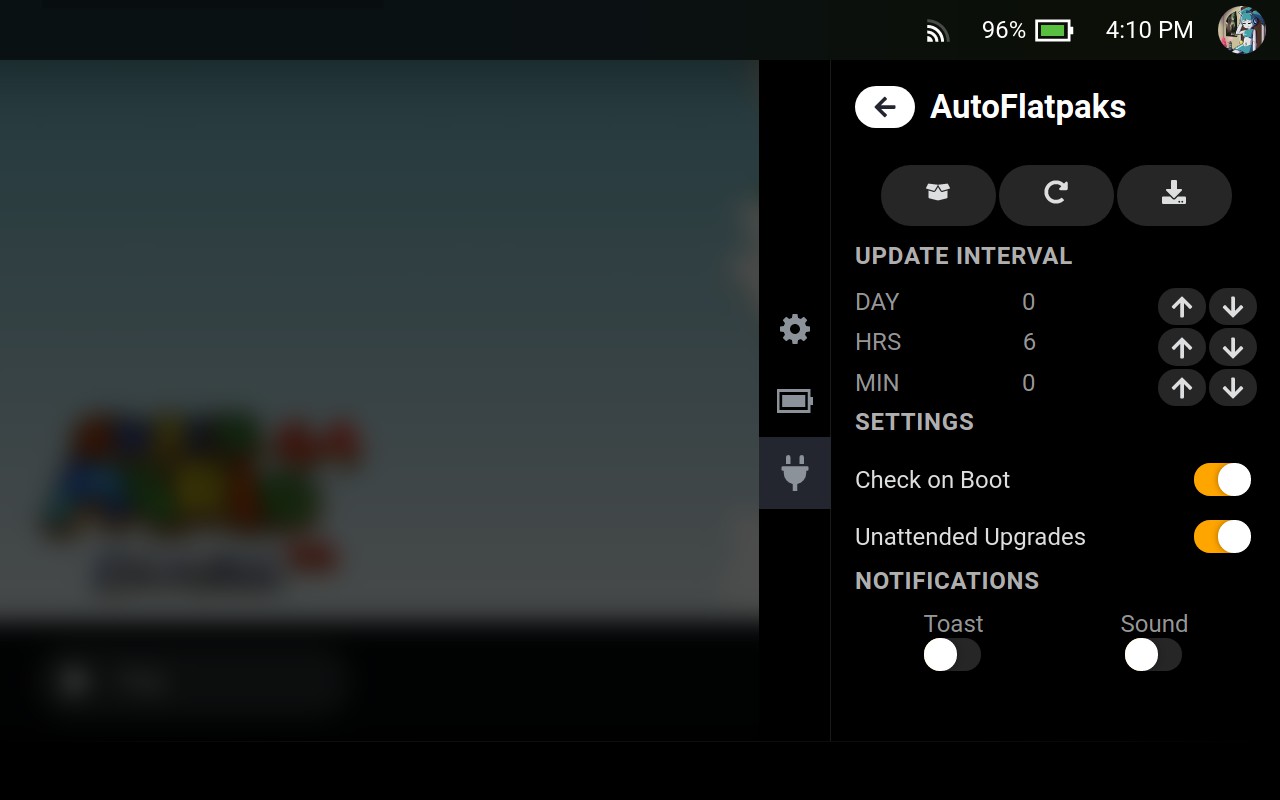
- automatically update Flatpaks on your system with AutoFlatpaks
- add art to non-Steam games (or customize art for existing Steam games) with SteamGridDB
- get connection type, battery percent, and charging status for external gamepads with Controller Tools
Emulation Made Easy with EmuDeck⌗
Emulating your legally backed-up games, from the NES all the way to the Switch, has been made incredibly easy with EmuDeck. This tool will install all the emulators of your choosing and automatically configure them for best use with the Steam Deck. After placing your ROMs into the appropriate folder, you can then run Steam ROM Manager through EmuDeck to add artwork for them and add them as non-Steam games. When the game is launched, the appropriate emulator will be used, providing a convenient out-of-the-box experience.

Here Be Dragons⌗
The following suggestions can be potentially harmful to your device if you don’t know what you’re doing. Please be careful!
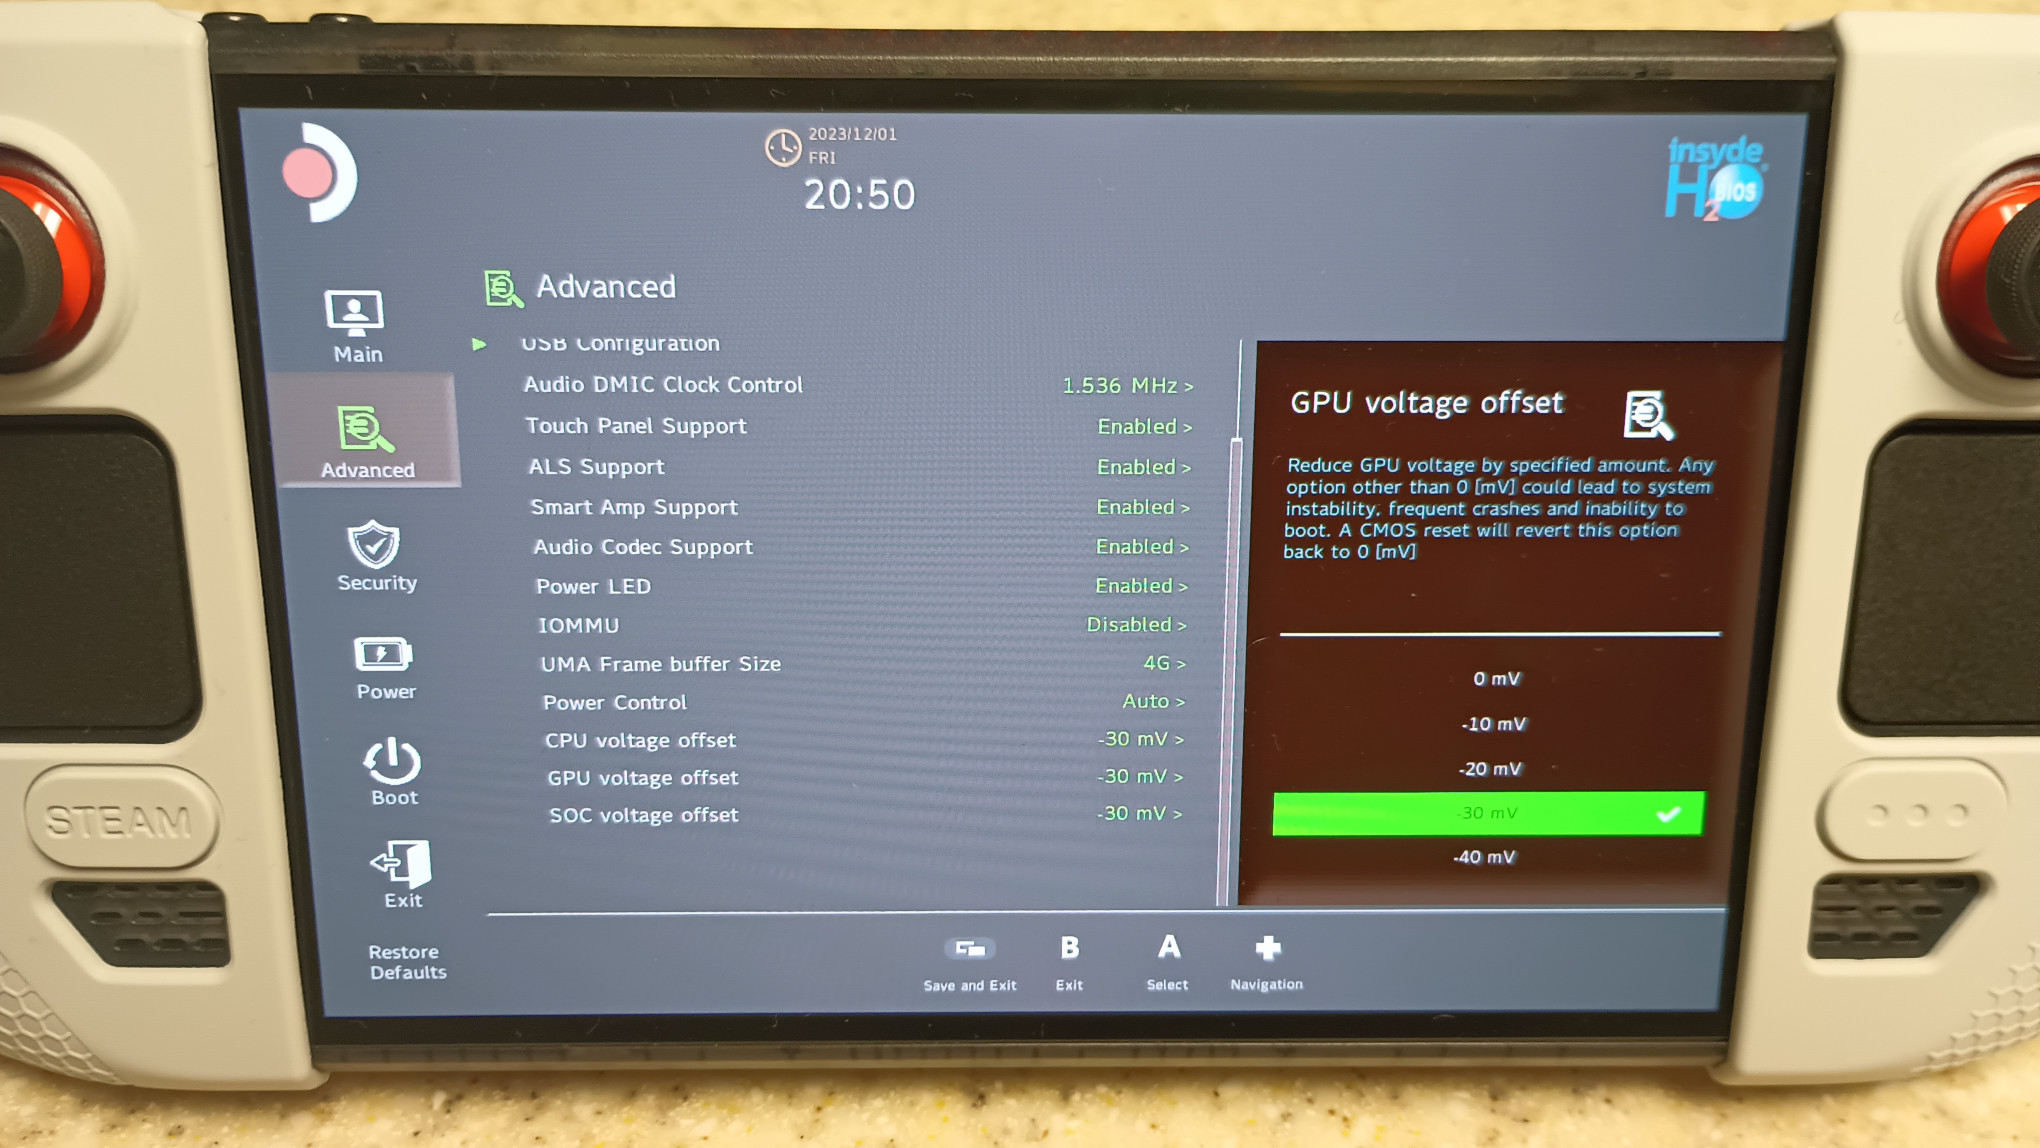
Undervolt for More Battery Life⌗
Undervolting the Deck can result in some small battery life gains. Access the BIOS by holding down the Volume+ button while turning the Deck on. Go to Setup Utility -> Advanced. At the bottom of the menu is CPU, GPU, and SoC voltage offset options. Gradually decrease these values -10mV at a time. Press the Back button to save your changes and restart. Run a couple of games, see what happens. If you don’t see any erratic crashing or visual artifacts, then you can keep decreasing these values until you start seeing them. In my case, I have my Deck undervolted to -30mV on the CPU, GPU, and SoC.
Convert the Filesystem to BTRFS for Disk Space Savings⌗
SteamOS uses ext4 by default on the /home/ partition. We can convert this to btrfs to save some space on the drive. On my LCD Deck, I saved over 50 GB of space, with all of my games and settings intact.
Overclock the display to 120 Hz for smoother gameplay⌗
Some models of the Steam Deck OLED ship with a BOE display. BOE displays are capable of going past the 90 Hz refresh rate. Keep in mind the gamma will shift past 109 Hz, so the colors won’t be as vibrant.
If, on the other hand, your display is from Samsung, I do NOT recommend overclocking the refresh rate, as some users have reported the display becomes garbled at 100 Hz and above.
That’s all! Do you have any other suggestions? Let me know in the comments!